


5. While in System Setup, perform the following steps to configure the system if it has an LS-120 SuperDisk drive:
a. Set Diskette Drive A and Diskette Drive B to Not Installed.
b. Set Secondary Drive 0 or Secondary Drive 1, as appropriate, to Auto.
c. Go to the second page and set Diskette to Off.
6. While in System Setup, reset the chassis intrusion detector under the System Security tab by changing Chassis Intrusion to Enabled,
Enabled-Silent, or Disabled.
7. If no other changes are required in System Setup, press <Esc> and follow the menu directions to restart the system and implement the
changes.
8. Run the Dell Diagnostics to verify that the system is operating correctly.
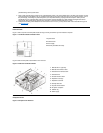
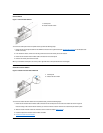
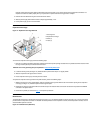
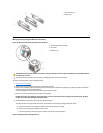
Eject, Power, and Reset Buttons
Figure 5. Eject, Power, and Reset Button Removal
To remove the eject, power, and reset buttons, perform the following steps:
1. Lay the computer cover on a flat work surface, with the inside of the top cover facing up.
2. To remove the 3.5-inch diskette-drive eject button, pull gently on the plastic part of the button until it comes free.
3. To remove the power button or the reset button, use a small screwdriver and push in the two or three plastic clips that hold the button to the
bezel.Whentheseclipsarereleased,thebuttonscomefreefromthebezel.
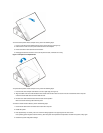
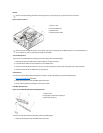
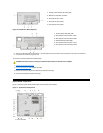
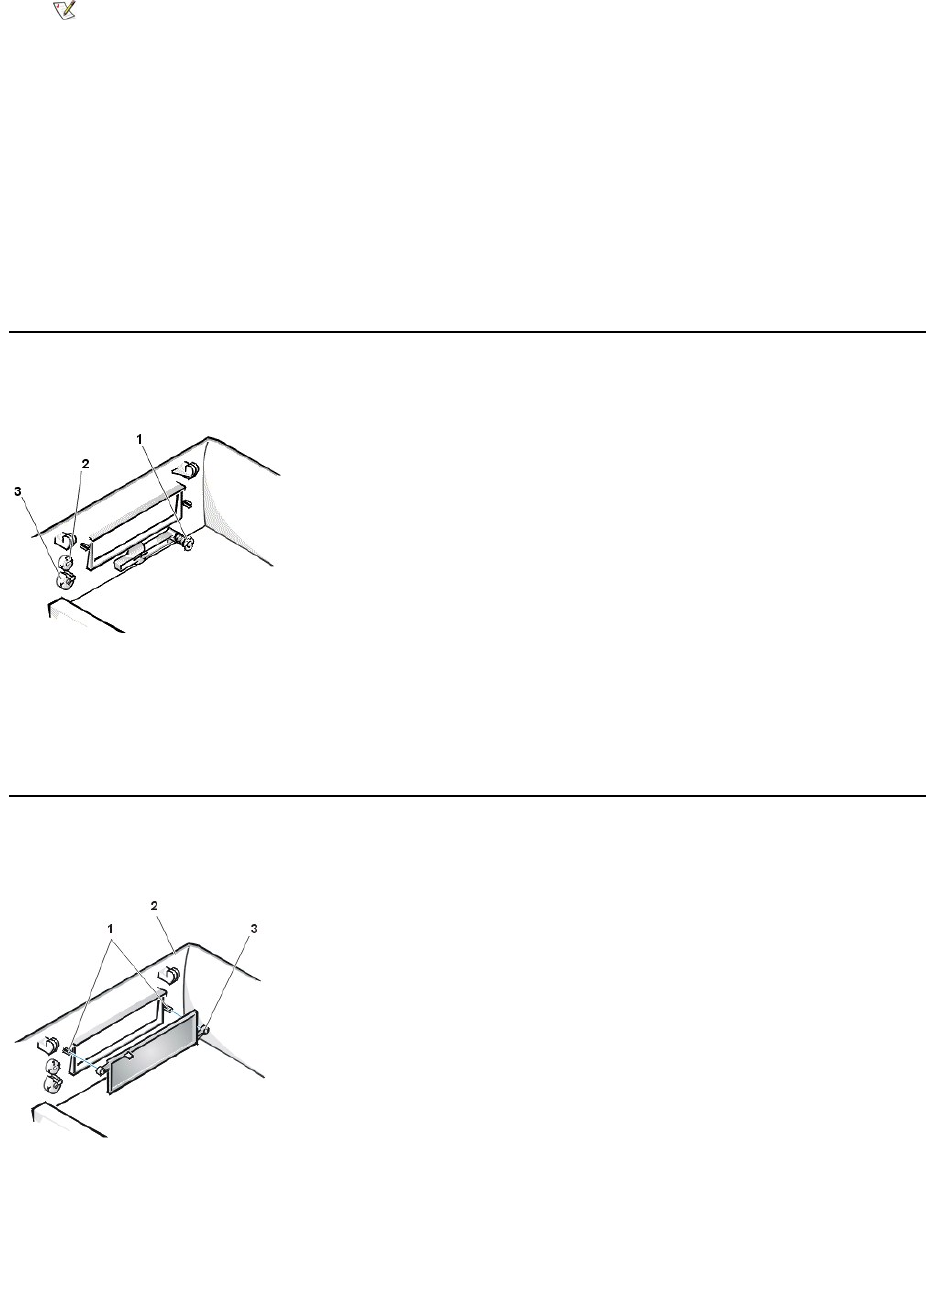
Front-Panel Inserts
Figure6.5.25-Inch Front-Panel Insert Removal
To remove a 5.25-inch front-panel insert, perform the following steps:
1. Hold the bezel with the front facing you.
2. From the front of the top cover, use your thumbs to press inward on the insert until it snaps free of the cover.
To replace a 5.25-inch front-panel insert, position the two ring-tabs over the posts on the inside of the bay opening, and then press the ring tabs
over the posts.
NOTE: If the system does not have an audio expansion card but does have an integrated audio controller, be sure that the
Sound setting is On. If the system has an audio expansion card, be sure that the Sound setting is Off.
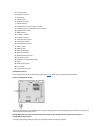
1
Disk eject button
2
Reset button
3
Power button
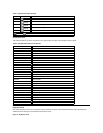
1
Posts (2)
2
Front of top cover
3
Ring tabs (2)