


218 Adding and Replacing Parts
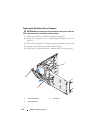
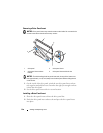
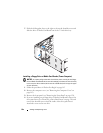
Removing a Drive-Panel Insert
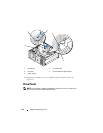
NOTICE: Drive-panel inserts may contain screws on the inside. You can attach the
screws to new drives that do not have any screws.
NOTICE: To avoid breaking the drive-panel insert tab, do not pull the insert more
than approximately 1 cm (½ inch) away from the drive panel before sliding the tab
out of the slot.
1
On the inside of the drive panel, pinch the two drive-panel insert release
tabs together and pull the insert out and to the right just enough to release
it from the drive panel.
2
Set the drive-panel insert aside in a secure location.
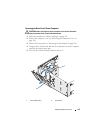
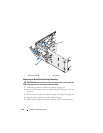
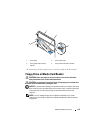
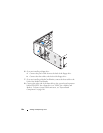
Installing a Drive-Panel Insert
1
Place the drive-panel insert tab into the drive-panel slot.
2
Pinch the drive-panel insert release tabs and press the drive panel insert
into place.
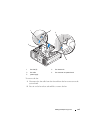
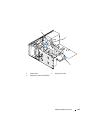
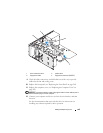
1 drive panel 2 drive-panel insert
3 drive-panel insert release
tabs (2)
4 drive-panel insert tab in tab slot
1
2
3
4