Printing to the DiscPainter Printer
13
Printing Multiple Copies
You can easily print multiple copies of the same disc image. After each print job is finished
printing, the Ink LED on top of the printer blinks yellow to indicate the print job is finished. You
can then remove the finished disc and insert a blank disc for the next print job.
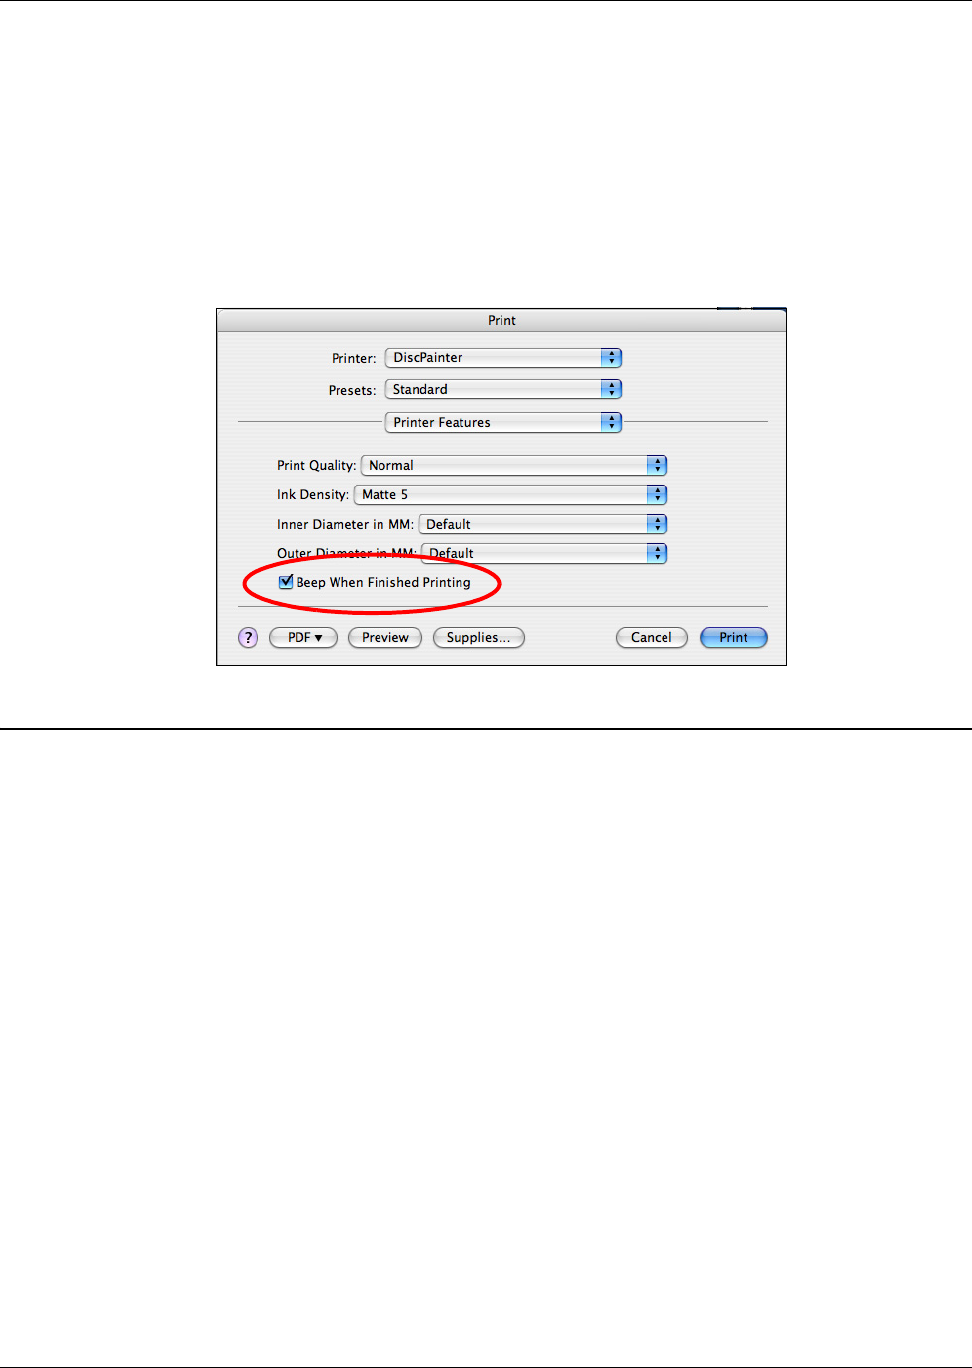
When printing multiple copies, you can configure the printer to beep after each disc is finished
printing to let you know when to insert a new disc.
To turn on the disc-finished-printing beep
♦ Select Beep When Finished Printing check box.
Printing to the DiscPainter Printer
This section describes the steps required to print images to your printer from applications other than
the Discus for DYMO software. The printing process varies to some degree with different
applications. Sample files for several common applications are provided to simplify printing from
these programs.
For details about printing using a particular program, see the documentation included with that
program. For information on using the printer with the Discus for DYMO software, see the Discus
for DYMO Online Help. Below are some general tips on using the printer with other applications.
To configure your application to print to the DiscPainter printer
• Set up a paper size that matches the size of the disc you are using.
For example, if printing to a Standard (120 mm, 4.7") disc, set up a paper size of 120 mm wide
and 120 mm high; if printing to a Mini (80 mm, 3.15") disc, set up a paper size of 80 mm wide
and 80 mm high.
• Set all the margins to 0.
The new document is a 120 mm or 80 mm square with no margins on any of the four sides. By
defining the appropriate paper size, your design will be centered on the paper.
Using Sample Files
Sample files for several popular graphics design programs are included in the Sample Documents
folder. These sample files contain the proper page settings for printing a CD/DVD design to the
DiscPainter printer.


