Chapter 4: Web Configuration
75
Bridging
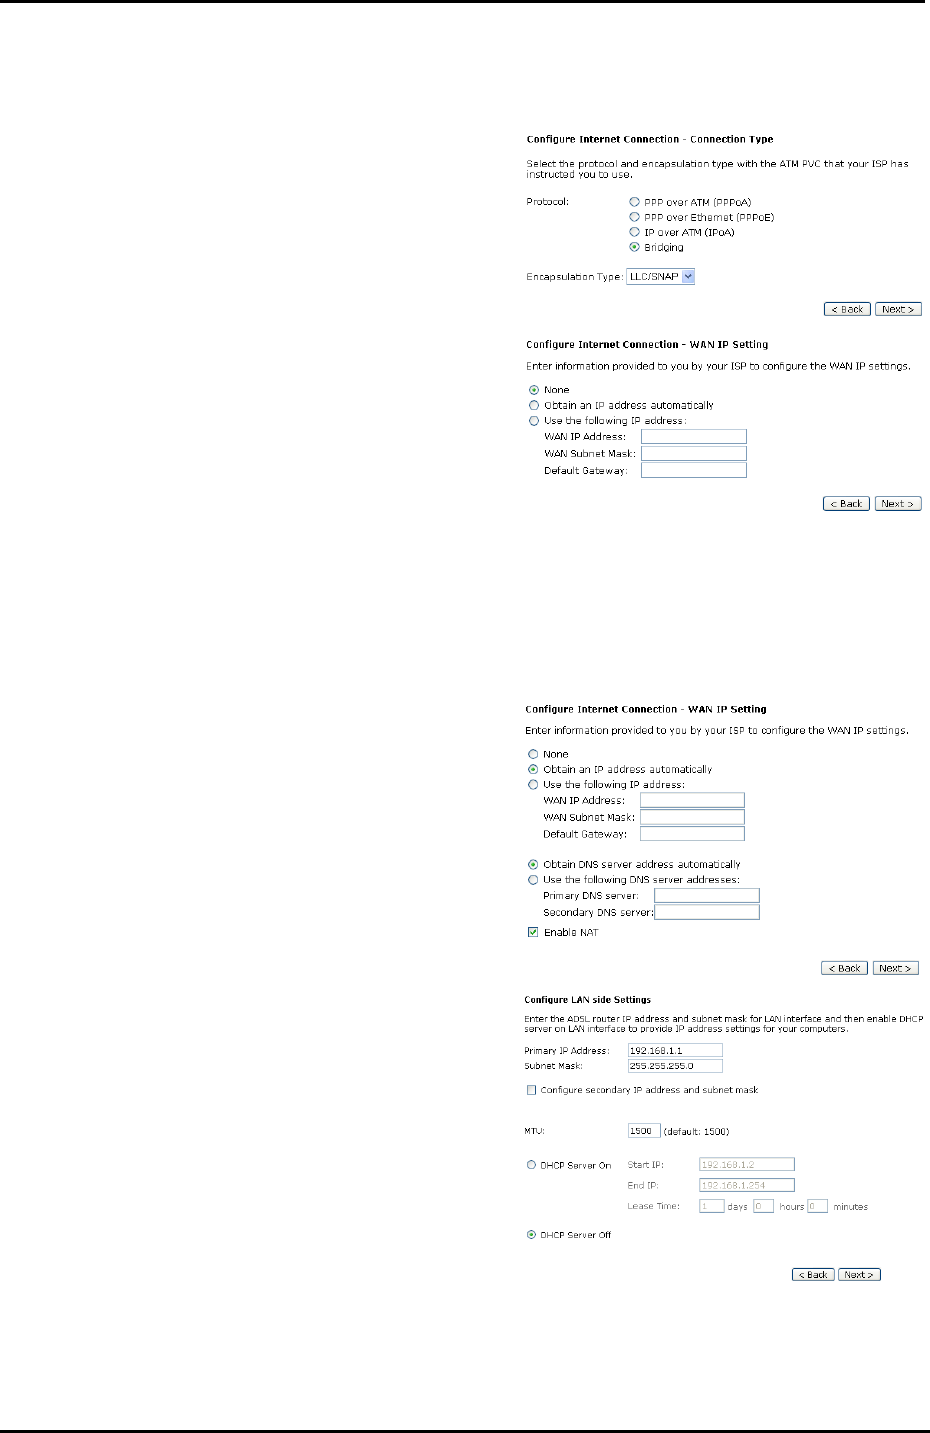
If the mode you choose is Bridging (or MER), please refer to the following
information.
The bridging mode can configure your
router to send and receive packets
between LAN and WAN interfaces.
The WAN interface is ATM PVC; the
LAN interface can be Ethernet, USB,
or Wireless.
Choose Bridging and click Next.
None:
If it is not necessary to set the WAN IP
address, please click this button. In
our example, we select this item.
Obtain an IP address automatically:
Click this button to allow the system to
get an IP address automatically.
WAN IP Address, WAN Subnet
Mask, and Default Gateway:
When choosing Use the following IP
address, you have to key in the IP
address, the subnet mask, and the
default gateway provided by your ISP
for the WAN interface.
While you choose to obtain the IP
address automatically or use specific
IP address, you have to decide
whether to select Obtain DNS server
address automatically or Use the
following DNS server address and
enter the information provided by you
ISP.
You may check Enable NAT if
necessary.
Press Next to continue.
The default setting is none, shown
as the figure above. While
selecting Obtain an IP address
automatically or Use the
following IP address, the DNS
setting appears, shown as the
figure below.
Primary IP Address & Subnet Mask:
Key in the IP address and the subnet
mask that provided by your ISP for
LAN interface. The primary IP address
and subnet mask for our example are
192.168.1.1 and 255.255.255.0,
respectively.
MTU: Please refer to PPPoA/ PPPoE.
DHCP Server On:
Check this item if DHCP service is
needed on the LAN. The router will
assign IP address and gateway
address for each of your PCs. If you
enable this function, you have to enter
the information for Start IP, End IP
and Lease Time. The default value for
lease time is one day.


