


Giving Your Presentation 63
Creating Your Own Startup Screen
You can transfer any image from your computer or video source to the
projector, and then use it as your startup screen. You can also use it as
the screen to be displayed when the projector is not receiving a signal
or when you press the
A/V Mute button. The image can be a
company logo, slogan, photograph, or any other image you want to
use.
Capturing the Image
Follow these steps to capture the image and transfer it to the projector:
1. Start by displaying the image you want to use. It can be an image
from either a computer or video source such as a DVD player or
digital camera.
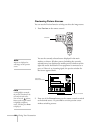
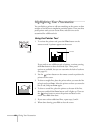
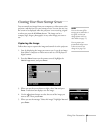
2. Press the
Menu button on the remote control, highlight the
User’s Logo menu, and press Enter.
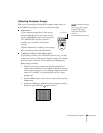
3. When you see the screen shown at right, select
Yes and press
Enter. A selection box displays over the image.
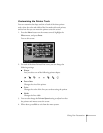
4. Use the pointer button to select the area of the image you
want to use. Then press
Enter.
5. When you see the message “Select this image?” highlight
Yes and
press
Enter.
note
You can also turn off the
message you see when there is
no signal, or when you
change picture sources or
color modes (see page 77).
You can protect your
personalized startup screen
so that no one else can
change it (see page 78).
[ ]: Select
[ ]: Select
Execute
Execute
Video
ideo
Audio
Audio
Ef
Ef
fect
fect
User’s Logo
User’s Logo
Advanced1
Advanced1
About
About
Reset
Reset
All
All
[ ]: Execute
[ ]: Execute
[Menu]: Exit
[Menu]: Exit
[ ]: Select
[ ]: Select
Setting
Setting
Advanced2
Advanced2
Accept the present image as user’s logo?
Accept the present image as user’s logo?
User’s Logo
User’s Logo
YES
YES
NO
NO