


PoleVault Systems Installation • Installation — Stage 1
2-2
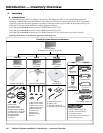
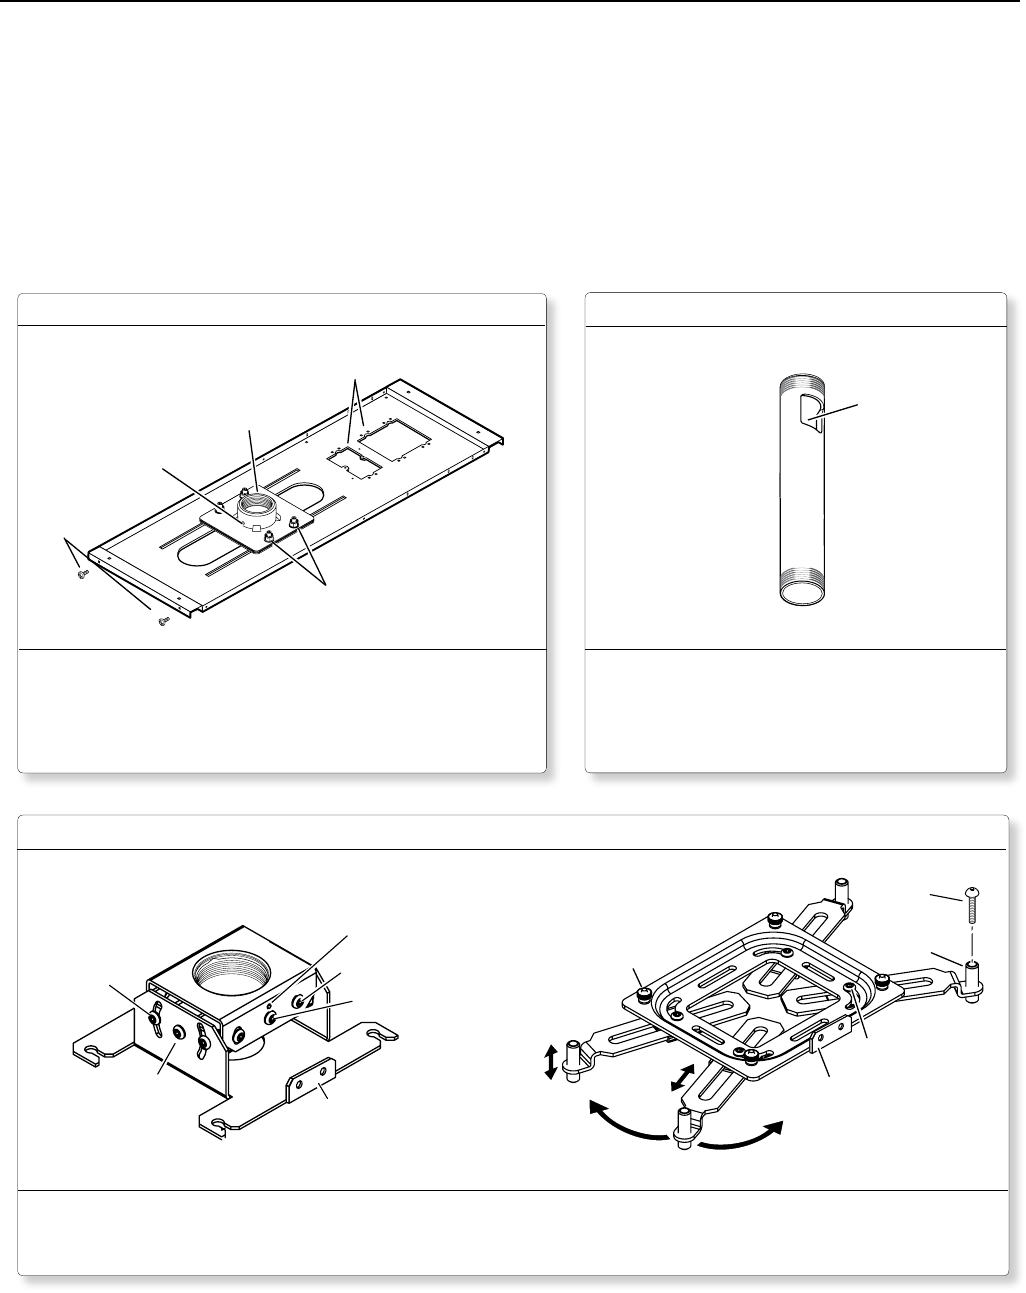
Stage One — Install the Screen and Projector
Stage 1
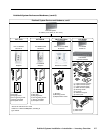
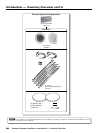
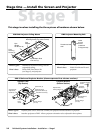
This stage involves installing the three pieces of hardware shown below.
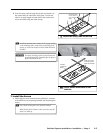
Cable
Access
Cutout
(install this
end uppermost)
Threaded at both
ends
PMP Projector Mounting Pole
T-bar
Securing
Screws (4)
Pipe Adapter Plate
Lock Nuts (4)
Pipe
Adapter
Pipe
Adapter
Set Screws (2)
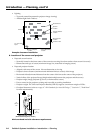
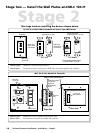
1-gang and 2-gang Accessory
Mounting Points (e.g. power sockets)
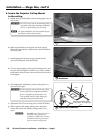
Where it goes: Attaches to structural ceiling, rests on
suspended ceiling.
What it does: Holds PMP, Pole Mount Kit
(see Stage 4), and projector.
Where it goes: Screws up into PCM 240.
What it does: Holds Pole Mount Kit and
projector.
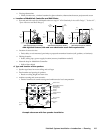
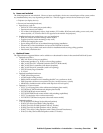
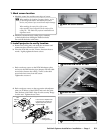
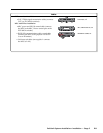
360° Movement
Projector Securing
Screw
Threaded
Barrels (4)
Arm Adjustment
Screws (4)
Adjuster Plate
Locking Screws (4)
Security Flange
(on rear)
Projector Bracket
(Bottom Section)
Adjuster Plate
(Top Section)
Pivot Point screws (4)
Horizontal Angle
Adjustment Screws (4)
Set Screws (2)
Security Flange
(on rear)
Vertical Angle
Adjustment
Screws (4)
Pivot
Point
Screw
UPB 25 Universal Projector Bracket (shown separated into the two sections)
Where it goes: Adjuster plate screws onto base of PMP, and projector bracket attaches to projector.
What it does: Attaches projector to PMP. Allows projector orientation to be adjusted in three planes.
PCM 240 Projector Ceiling Mount