


1-10 Unpacking and Assembly
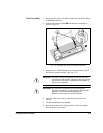
7. Locate the printer on a flat, level floor, with all four wheels of
the stand resting stationary on the floor. The printer must
remain stationary and level for proper ink flow and best print
quality.
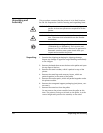
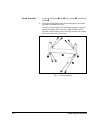
8. Using three of the screws provided, attach the Big Ink Deliv-
ery System tray
➏
. (See Fig. 1-3.)
There are two sets of mounting screw holes. Use the set of
holes closest to the center (farthest from the end) of the
printer.
Insert the three screws and tighten them most of the way,
then insert and drop the trays into place onto the screws,
then tighten the screws the rest of the way.
9. Remove the shipping bands from the long black chain con-
nected to the print head carraige.
10. Remove the foam block that immobilizes the carriage for
shipping.
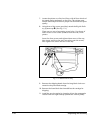
11. Install the service station by inserting it into the rectangular
cutout inside the right endcap (behind the control panel).
Fig. 1-3. Attach the ink tray