


McDATA® 4Gb SAN Switch for HP p-Class BladeSystem user guide 35
• Secret is 16 byte length for MD5 authentication, and 20 bytes if authentication is SHA-1.
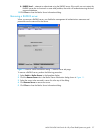
To add a member to a security group, perform the following procedure:
1. Choose one of the following to open the Edit Security dialog from the faceplate display:
•Click Security on the tool bar.
• Select Security > Edit Security.
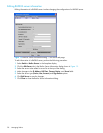
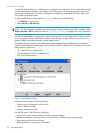
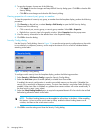
2. Choose one of the following to open the Create a Security Group Member dialog:
• Click a security group in the graphic window of the Edit Security dialog. Click Security Member in
the tool bar.
• Right-click on a security group in the graphic window of the Edit Security dialog. Select Create
Members from the popup menu.
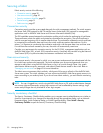
3. Open the Group Member drop-down list and select a Node World Wide Name. The switch must be a
member of any group in which authentication is used. You can also enter a hex value.
4. Open the Authentication drop-down list, and select a type of protocol to be used for the authentication
process for that member.
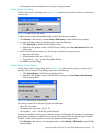
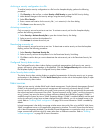
• ISL authentication options are None (0 bytes), CHAP (16 bytes)
• MS (CT — Common Transport) authentication options are None (0 bytes), MD5 (16 bytes), SHA
(20 bytes)
• Port authentication options are None (0 bytes), CHAP (16 bytes)
5. Enter an authentication "password" to be assigned that member in the Secret area. Or, click Generate
to randomly generate a secret.
6. Enter the domain ID (97–127) for the switch for the ISL group member in the Binding field (ISL groups
only). The WWN of the switch must be at the entered domain ID when attempting to enter the fabric,
otherwise it will become isolated.
7. Click OK to save the changes.
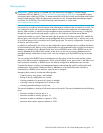
Editing the security configuration on a switch
To edit a security configuration on the switch from the faceplate display, perform the following procedure:
1. Choose one of the following to open the Edit Security dialog:
•Click Security on the tool bar.
• Select Security > Edit Security.
By default, the security configuration on the switch is displayed in the Edit Security dialog.
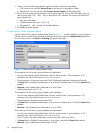
2. Choose one of the following from the Edit Security dialog:
• Select File > Open File. Browse for and select the security file.
•Press Control+O (letter o). Browse for and select the security file.
3. Click Open to display the security file in the Edit Security dialog.
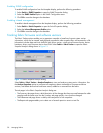
4. Select the security item to edit in the graphic window, and choose one of the following:
• Rename a security set, or group. Select a rename option from the Edit menu. Enter a new name in
the Rename dialog. Click OK to save the changes.
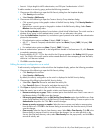
• Edit security group member. Select an Edit Security Group Member option from the Edit menu. Enter
a new Group Member (WWN) in the Edit Security Group Member dialog. Choose an option in the
Authentication drop-down list. Click OK to save the changes.
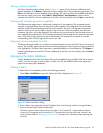
• Remove a security set, group, or member. Select the item to remove, and select a remove option
from the Edit menu. Click OK in the Remove dialog to remove that item from the security file and
save the changes.
• Clear security. Select the Security Sets directory name. Select Edit > Clear Security. Click OK in the
Remove dialog to remove all security sets and save the changes. You can also right-click on the
Security Sets (top level) directory name, select Clear Security from the popup menu, and click OK to
remove all security sets.