


McDATA® 4Gb SAN Switch for HP p-Class BladeSystem user guide 39
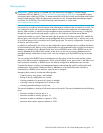
Saving a version snapshot
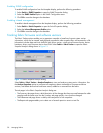
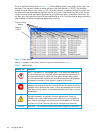
The Fabric Snapshot Analysis dialog, shown in Figure 19, opens with the Summary, Differences and
Reports tab pages. Click Browse to open and view the snapshot files in the corresponding tab pages. Click
Close to exit the Fabric Version Snapshot Analysis dialog. The color key below the scrollable area defines
the meanings of the colors used. Select Fabric > Fabric Tracker > Save Snapshot to save the current
snapshot to an XML file. Choose a pathname for the file in the Save dialog, and click Save to save the file.
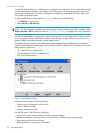
Viewing and comparing version snapshots
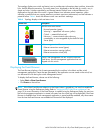
The Differences tab page shows a side-by-side comparison of two snapshots. The timestamp of each
snapshot is displayed above the scroll area showing that snapshot. The background color of the older
snapshot is darker than the background of the newer snapshot. The arrow icon between the snapshot
selectors always points from the older snapshot to the newer one. If the two snapshots have the same
timestamp, the arrow will not be displayed. The scroll bars are synchronized to view the same portion of
each snapshot file simultaneously. Click and drag the separator bar between the two panes to resize each
pane. Click the left/right arrows at the top of the separator bar between the two panes to close the
corresponding pane. The left/right arrows move to one side.
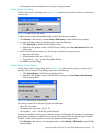
Exporting version snapshots to a file
The Reports tab page enables you to select one of several reports to save to a text file. The are two types of
reports. The Summary report type shows the same format displayed on the Summary tab page without the
color highlighting. The Detail report type shows a detailed breakdown of the differences. Click Export to
save the selected report to a text file. Choose a pathname for the file in the Save dialog, and click Save to
save the file.
Managing the fabric database
A fabric database contains the set of fabrics that you have added during a McDATA Web Server session.
Initially, if you do not open an existing fabric or fabric view file, the McDATA Web Server application
opens with an empty fabric database.
Adding a fabric
To add a fabric to the database, perform the following procedure:
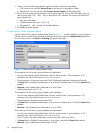
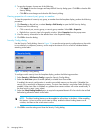
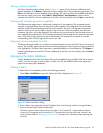
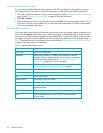
1. Select Fabric > Add Fabric to open the Add a New Fabric dialog shown in Figure 20.
Figure 20 Add a New Fabric dialog
2. Enter a fabric name (optional) and the IP address of the switch through which to manage the fabric.
3. Enter an account (login) name and password.
The factory account name and password are "admin" and "password". A password must have a
minimum of 8 characters and no more than 20. The password is for the switch and is stored in the
switch firmware. Refer to ”Managing user accounts” on page 63 for information about creating user
accounts.