


McDATA® 4Gb SAN Switch for HP p-Class BladeSystem user guide 53
You cannot edit an active zone set on a switch. You must configure an inactive zone set to your needs and
then activate that updated zone set to apply the changes to the fabric. When you activate a zone set, the
switch distributes that zone set to the temporary zoning database on every switch in the fabric. However, in
addition to the merged active zone set, each switch maintains its own original zone set in its zoning
database. Only one zone set can be active at one time.
NOTE: If the Interop Auto Save parameter is enabled on the Zoning Configuration dialog, then every time
the active zone set changes, the switch will copy it into an inactive zone set stored on the switch. You can
edit this copy of the active zone set stored on the switch, and activate the updated copy to conveniently
apply the changes to the active zone set. The edited copy then becomes the active zone set.
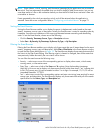
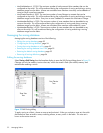
The Edit Zoning dialog has a Zone Sets tree on the left and a Port/Device (or members) tree on the right.
Both trees use display conventions similar to the fabric tree for expanding and contracting zone sets,
zones, and ports. An expanded address shows the port World Wide Name.
You can select zone sets, zones, and ports in the following ways:
• Click a zone, zone set, or port icon.
• Right-click to select a zone set or zone, and open the corresponding popup menu.
• Press and hold Shift while clicking several consecutive icons.
• Press and hold Control while clicking several non-consecutive icons.
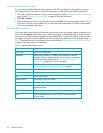
Using tool bar buttons, popup menus, or a drag-and-drop method, you can create and manage zone sets
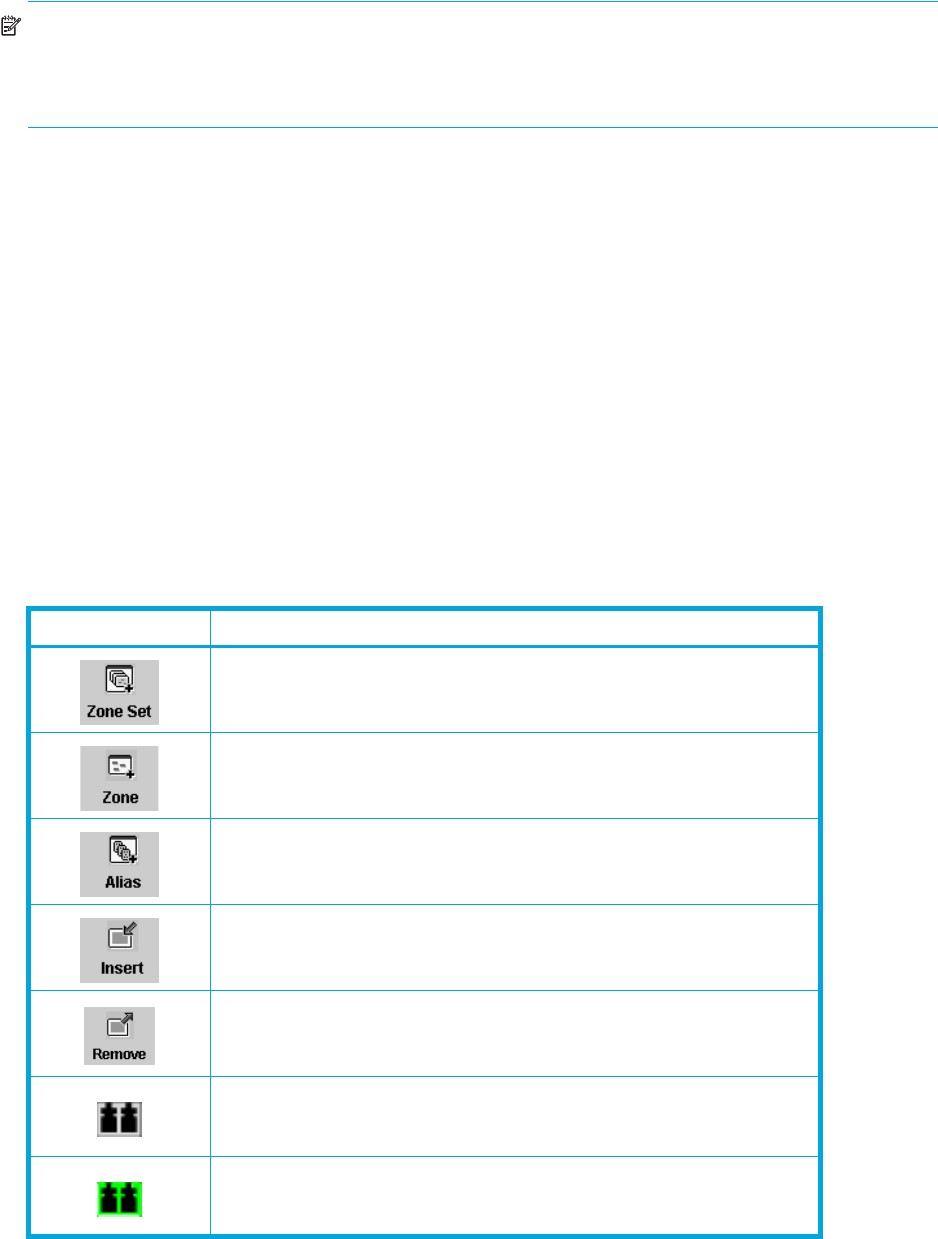
and zones in the zoning database. Table 7 describes the zoning tool bar operations.
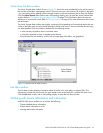
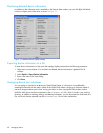
Use the Edit Zoning dialog to define zoning changes, and click Apply to open the Error Check dialog.
Click Error Check to have McDATA Web Server check for zoning conflicts, such as empty zones, aliases,
or zone sets. Click Save Zoning to implement the changes. Click Close to close the Error Check dialog.
Click Close in the Edit Zoning dialog to close the Edit Zoning dialog.
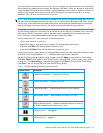
Table 7 Edit Zoning dialog tool bar buttons and icons
Tool bar button Description
Create Zone Set button — create a new zone set
Create Zone button — create a new zone
Create Alias button — create another name for a set of objects
Add Member button — adds selected port/device to a zone
Remove Member button — delete the selected zone from a zone set,
or delete the selected port/device from a zone
Switch port icon — not logged in
Switch port icon — logged in