


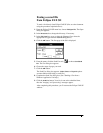
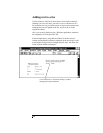

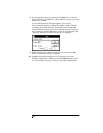
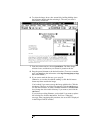

Adding text with the Edit toolbar
To display the Edit toolbar, click the Edit tool on the View or
Thumbnail toolbars. Although most of the tools are the same, some
special Edit tools let you add text to faxes. See The
View Menu
,
discussed earlier in this section.
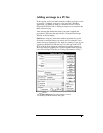
1.
Click the
Text
tool.
2.
Position the cursor where you want to add the text and click the left
mouse button. (Remember, when you add text, the existing text does
not move to make room as a word processor does. Instead, after
clicking the Text tool, the new text will be superimposed on the
existing text.
3.
Start typing; the text you add is shown in red. As the text does not
automatically wrap, press the
Enter
key when you reach the end of a
line, to begin a new line.
Note:
Although you can delete text with the backspace key, once
you click your mouse button outside the text, you will not be able to
change or delete the new text, except by closing and reopening the
fax.
4.
After adding text in the current location, click the left mouse button
outside the text.
5.
To add text in another location, repeat steps 2 through 4.
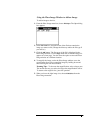
6.
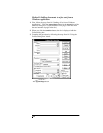
When you have finished adding text, if you want to send the fax now,
go on to step 10. Otherwise, to save your changes without sending the
fax, choose
File/Close
. You are prompted, "Save changes to
document?" Click the
Yes
button. The Save As dialog box appears.
Enter a filename (change the drive and/or directory if necessary) and
click the
OK
button. If the filename you chose already exists, you'll
be asked if you want to replace the existing file. Click the
Yes
button.
7.
To send the fax now, choose
Send/Send Fax,
otherwise
go to step 10. If
you began this process by sending a fax from a Windows application
(Method 1), you'll see "Compressing" and "Merging" messages, and
your fax is sent at the scheduled time.