


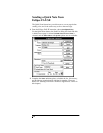
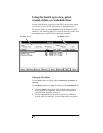

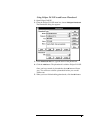

Printing the Send Log
To print the Send Log, from the
Send Log
menu click the
Print Log
button. The Printer Setup dialog box appears; select HP OfficeJet
Printer, if it isn't selected and click the
OK
button. The Send Log is
printed.
Printing a fax
For information on printing faxes, see "Printing Faxes and Files" later
in this chapter.
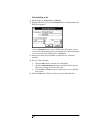
Deleting faxes
To delete one or more faxes from the Send Log, follow these steps.
Note, once a fax has been deleted, it can't be recovered.
N
To delete one fax, highlight the entry and click the
Delete
button.
N
To delete more than one fax, hold down the Ctrl key and
highlight the entries by clicking on them. When you have
highlighted all the entries you want to delete, click the
Delete
button.
N
To delete every fax that is currently displayed in the Send Log,
click the
Delete All
button. You are asked, "Delete all items in the
log?" Click the
Yes
button.
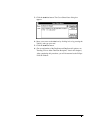
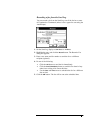
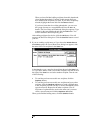
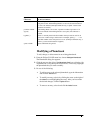
If the fax status was Pending, the data file and the entry are both
deleted. If the fax had a status other than Pending, the message
shown below appears. Click the
Delete Data File and Entry
button to
delete both the fax's data file and the entry in the Send Log. Click
Delete Data File Only
to delete the fax's data file but keep the entry in
the Send Log.