


6.
To fax the file now, choose
Send/Send Fax
.
If you started this procedure by sending a fax from a Windows
application (Method 1), the fax is sent at the scheduled time. On
completing this procedure, you will return to the Windows
application, from which you started.
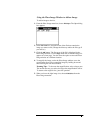
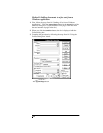
If you started this procedure by opening a file or using the Send or
Receive Log (Methods 2 and 3), the Fax dialog box is displayed.
Choose the range of pages you need and click the
OK
button. The
Send Fax dialog box appears.
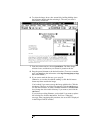
Click the
Send Fax
button (or see "Sending a Fax from a Windows
Application" for help). The fax is sent at the scheduled time. The
faxed document appears in the Eclipse FAX SE window at the
completion of this procedure.
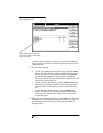
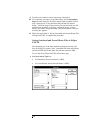
Adding an Image to Cover Pages
Although you can add text and images to cover pages (you have five
different types to choose from - see "Viewing the Eclipse FAX SE
Cover Pages" for samples), you can't change their name or location,
or generate new ones. Each cover page has two file names:
N
Filename.CVR contains the image of the cover page.
N
Filename.CCF describes the placement of information on the
cover page.
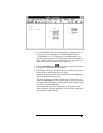
When modifying a cover page, save it with its original filename,
otherwise it will not be recognized as a cover page, e.g.,
[filename].OLD.
To add text to cover pages, see "Adding Text to a Fax." To add an
image to a cover page, follow the steps below.