


Chapter 4—Setup Adjustments
4-28 Hughes-JVC Technology Corporation
To adjust XY Registration:
1. Access the G
EOMETRY MENU
.
2. Verify that the R
EG
E
NABLE
box is checked. This toggle is normally ON
and is toggled to OFFonly for maintenance.
3. Use the RGB
TOGGLE
and the H
IDE KEY
to hide Red and Blue.
4. If Green geometry is good, unhide Red and Blue.
O
R
if Green geometry is questionable, recheck it now.
a. Use the Standard Crosshatch test pattern to verify.
b. If geometry is not satisfactory, make touch-up corrections.
c. Green geometry must be correct before proceeding because Green is
used as a reference to converge Red and Blue.
d. If necessary, repeat any timing or geometry adjustments from Section 4.2
on page 4-9 and Section 4.3 on page 4-11
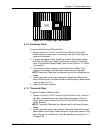
5. Access the T
EST
P
ATTERN MENU
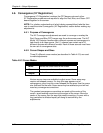
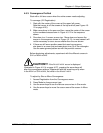
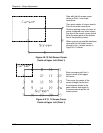
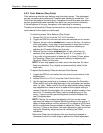
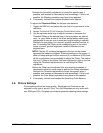
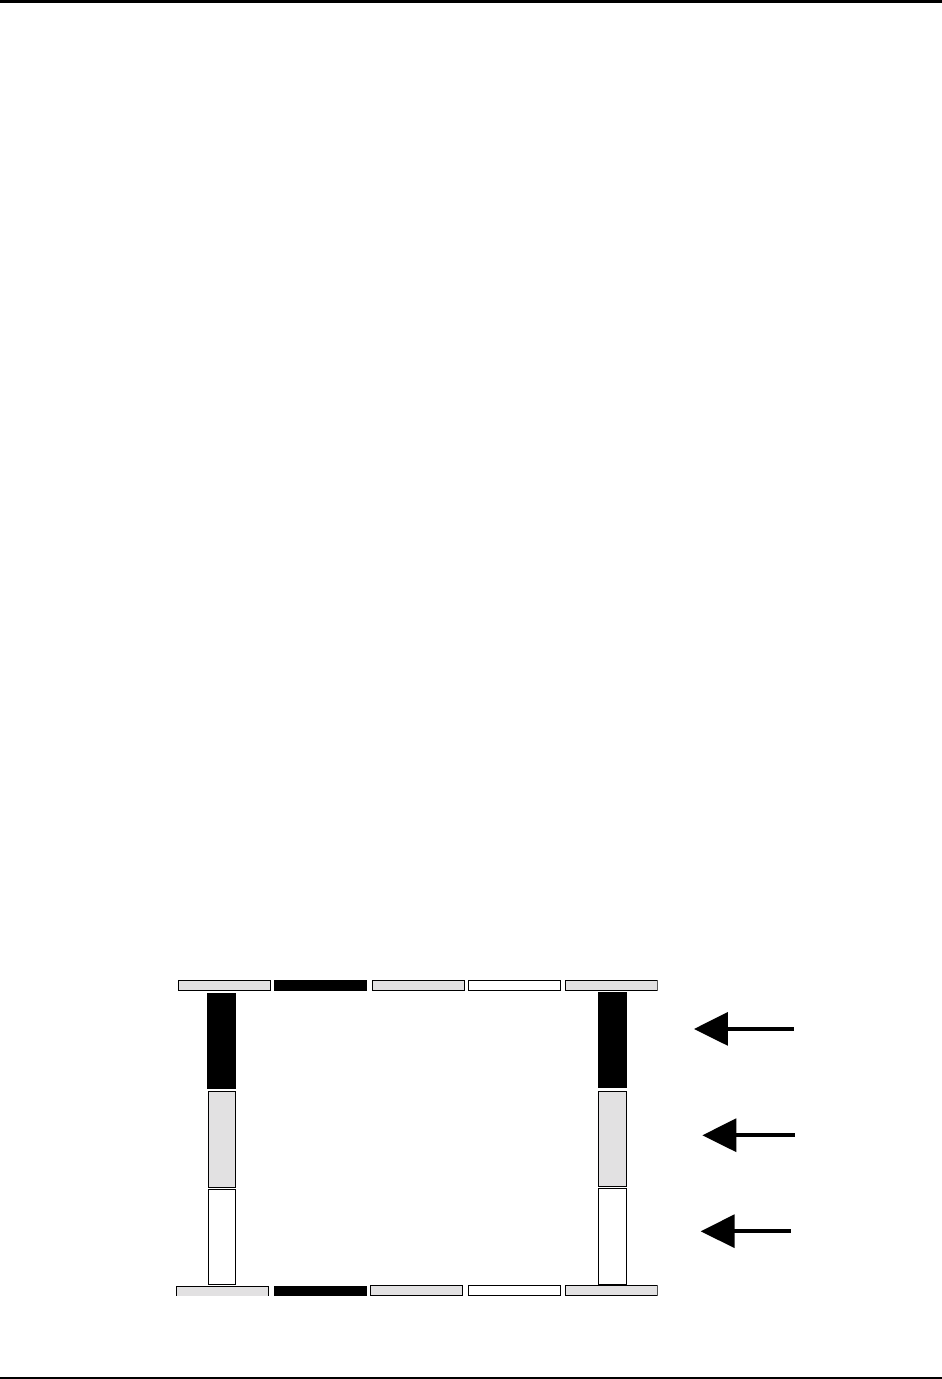
and select RGB X-hatch. This test pattern is
a series of Red, Green, and Blue bars that form small rectangles on the
screen. The rectangles in Figure 4.0-15 show a Correctly Converged RGB
Pattern and Figure 4.0-16 illustrates Incorrectly Converged RGB Patterns
(two examples). If this is a black and white illustration, Red is shown as
white, Green as shaded, and Blue as black.
6. Access the C
ONVERGENCE MENU
and select R
EGISTRATION
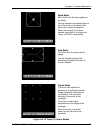
. The convergence
screen will display one of the cursor modes shown in Figure 4.0-14.
7. Use S
IZE MODE
first. If the M
OVE MODE
displays, press M
ODE
to toggle to the
S
IZE MODE
. If the A
DJUST MODE
displays, press E
NTER
to toggle to the
M
OVE
/S
IZE MODE
then, if necessary, press M
ODE
to toggle to the S
IZE MODE
.
8. Use the S
IZE MODE
to increase the cursor size to a full screen cursor.
To view a full screen cursor:
a. Move the cursor to the center of the screen.
b. Toggle the M
ODE KEY
to the M
OVE CURSOR
.
c. Use the arrow keys to place the cursor at the center of the screen, then
toggle the M
ODE KEY
to return to the S
IZE MODE
.
d. Continue to size the cursor to a full screen.
Figure 4.0-15 Correctly Converged RGB Pattern
Blue
Red
Green