CONTENTS INDEX SEARCH HELP
Operator’s Guide
Printing
Guide
Color Management
Calibration
Overview
Setting up the Printer
Operating the Printer
Troubleshooting
Site Specifications
Accessories
Customizing the
Printer
Network
Interface Guide
Loading the Ribbon into the Printer
The ribbon fits easily in the printer. There is only one way to correctly
place the spools.
Follow these steps to load a ribbon:
IMPORTANT: Hold the ribbon spools by the ends to avoid fingerprints.
Also, wear lint-free gloves when handling ribbon spools.
1. Remove the old ribbon spools, and dispose of them.
NOTE: Images remain on the ribbon after printing. If you are working
with confidential documents you may need to consider alternate
ways of disposing of the ribbon to maintain security.
2. Clean the print head. Ref
er to “Cleaning the Print Head” for
instructions.
3. Remove the new ribbon spools from the box.
The supply spool is longer than the take-up spool. For new ribbons,
the supply spool is loaded with ribbon, and the take-up spool is
empty.
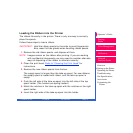
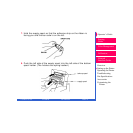
4. Push the left side of the take-up spool into the left side of the top
spool holder. (The holders are spring loaded.)
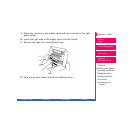
5. Match the notches in the take-up spool with the notches on the right
spool holder.
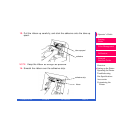
6. Insert the right side of the take-up spool into the holder.


