


Attention:
v Do not touch the microprocessor contact; handle the microprocessor by the
edges only. Contaminants on the microprocessor contacts, such as oil from
your skin, can cause connection failures between the contacts and the
socket.
v Handle the microprocessor carefully. Dropping the microprocessor during
installation or removal can damage the contacts.
v Do not use excessive force when you press the microprocessor into the
socket.
v Make sure that the microprocessor is oriented and aligned and positioned in
the socket before you try to close the lever.
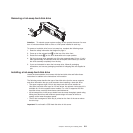
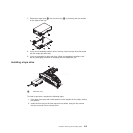
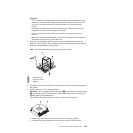
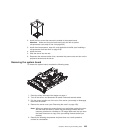
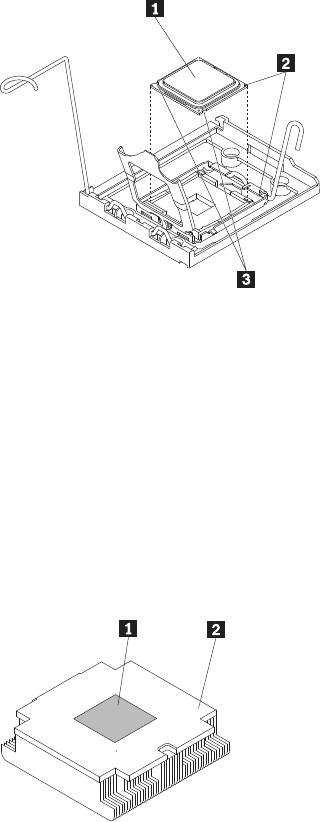
3. Align the microprocessor with the socket (note the alignment mark and the
position of the notches); then, carefully place the microprocessor on the socket.
Close the microprocessor bracket frame.
Note: The microprocessor fits only one way on the socket.
1 Microprocessor
2 Alignment marks
3 Notches
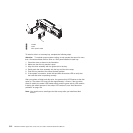
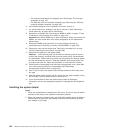
4. Carefully close the microprocessor release lever to secure the microprocessor in
the socket.
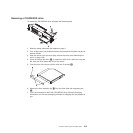
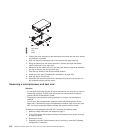
5. Install a heat sink on the microprocessor.
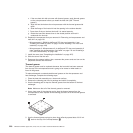
Attention: Do not touch the thermal grease 1 on the bottom of the heat sink
2 or set down the heat sink after you remove the plastic cover. Touching the
thermal grease will contaminate it.
The following illustration shows the bottom surface of the heat sink.
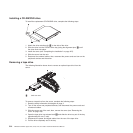
a. Make sure that the heat-sink release lever is in the open position.
b. Remove the plastic protective cover from the bottom of the heat sink.
Chapter 6. Removing and installing FRUs 219