


Section 3
Operation
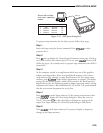
3.1 Overview This section explains how to operate the projector once it has been installed
and is ready for use. If you have not yet set up the projector, refer to
Section 2, Installation and Setup.
Before using the projector for the first time, it is recommended that you
read through this section of the manual. Although the projector is easy to
use, there are many advanced features which allow you to enhance perform-
ance and operation. By understanding these features, and how to use them,
you will soon be able to take full advantage of the projector’s extensive
capabilities.
Organization of this section is as follows:
3.1 Overview
3.2 Projector Basics
3.3 Source Selection
3.4 Setup Memories
3.5 Display Adjustments
3.6 Convergence Registration
3.7 Utility Features
3.8 Multi-projector Functions
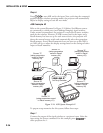
3.2 Projector
Basics
Notice that the projector has no knobs or moving parts to make adjustments
or change control settings. This is because all user adjustments are digitally
controlled via the projector’s keypad. Adjustment settings are retained in the
projector’s internal memory, even when the projector is unplugged.
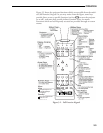
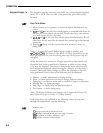
Keypads ➤ Four types of keypads may be used with the projector: built-in, IR remote,
wired remote, and touch-screen. The projector includes a multi-use, full func-
tion, backlit keypad which is factory configured for use as a built-in keypad.
It can easily be reconfigured for use as an IR remote keypad or a wired remote
keypad. A Madrigal IRIQ programmable touch-screen remote is also included
for overall system control. Use the keypad type which is most appropriate for
your application.
3.1