MaxNAS Owner’s Manual
42
with Thecus modules, and you may wish to create your own or add other user created
modules as well; There is a Thecus community with many various modules available at their
website http://onbeat.dk/thecus. Please note that Micronet offers no support or endorsement
for any content on this site.
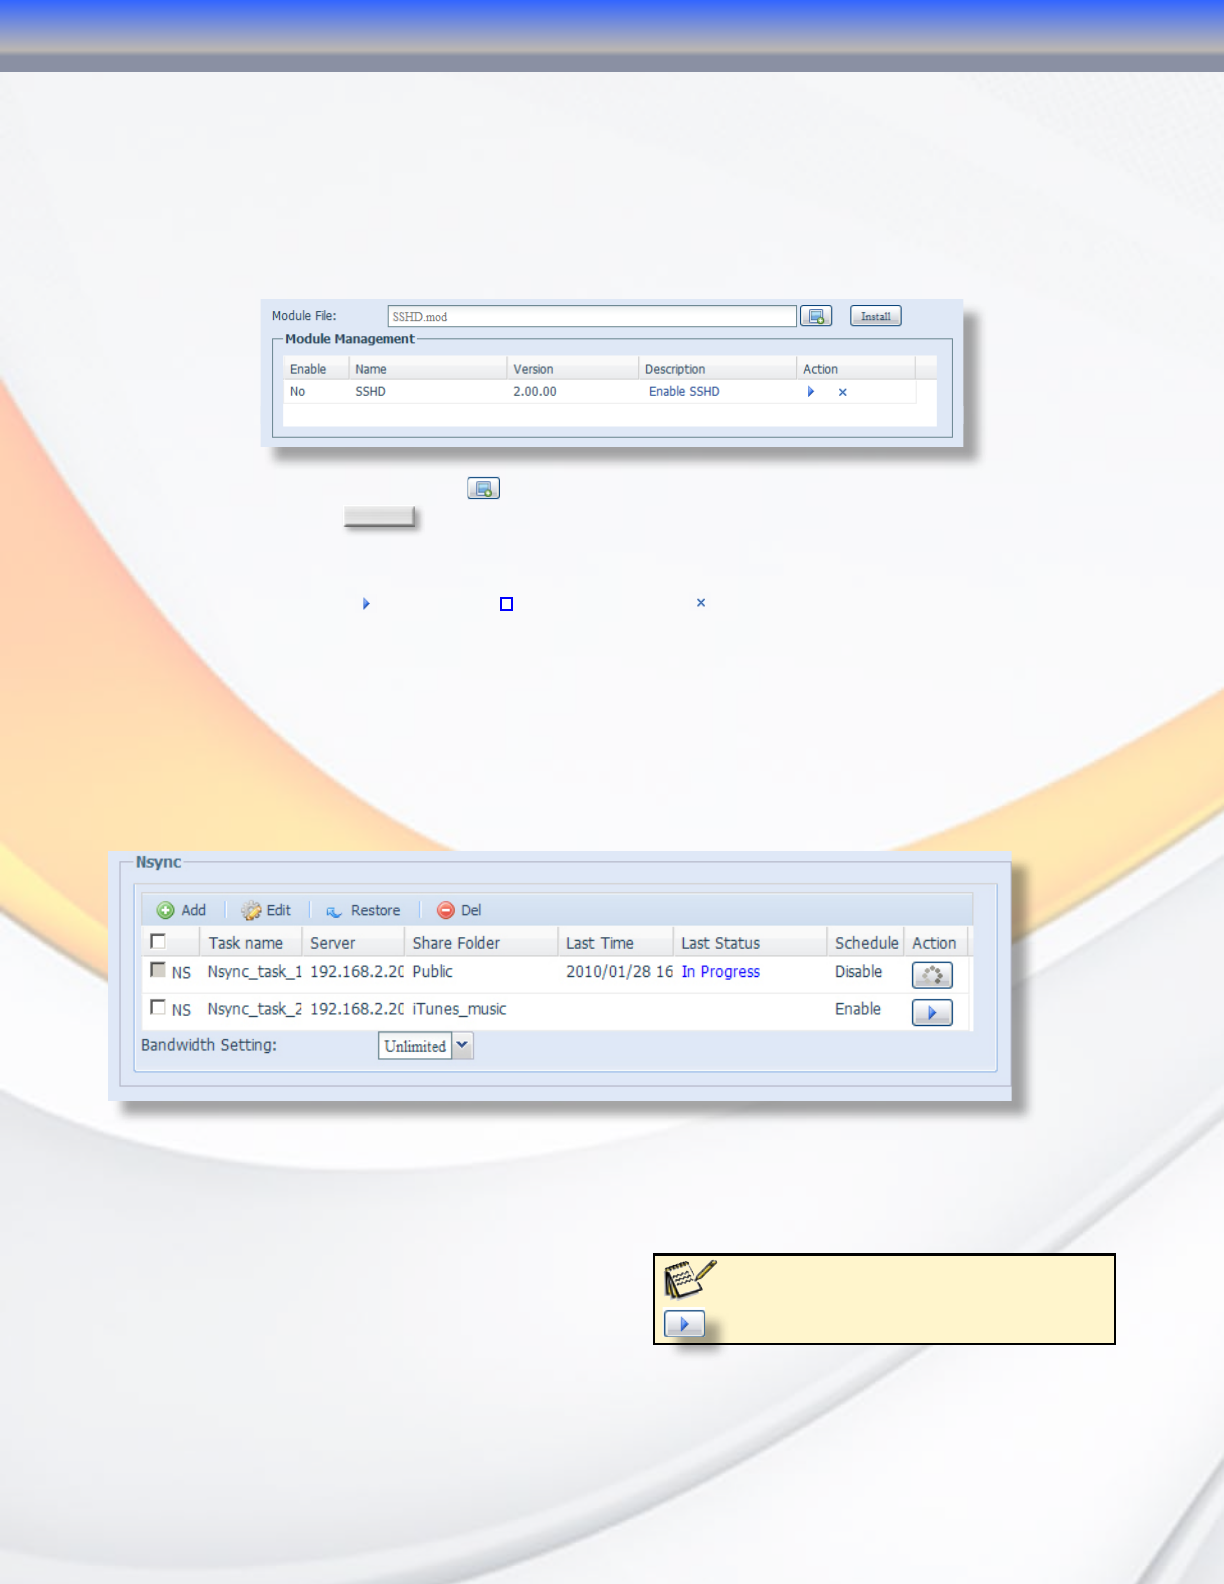
All installed modules will be listed in one of the two sections of the Module Menu. To access
the module management, navigate to “System” -> “Module Management.”
• To install a new module, click next to the module file entry box. Navigate and select the
module file. Click
Install
to begin the upload, and confirm the operation in the following
confirmation dialog.
• To enable, disable, or uninstall a module, click the respective function to the module in
the action column-
to enable, to disable, and to remove the module completely.
• Modules that install a user interface will be accessible by navigating to their respective
menu item that will appear in “System” -> “Module Management” -> “User Modules.”
8. Backup and Synchronization Services
The Backup menu contains all of the status updates and configuration options for the nSync
and rSync services. To access the backup feature controls, navigate to “System” -> “Backup”
-> “Nsync”.
The nSync menu lists all of the nSync or rSync jobs that have been created. The table on this
page displays the name of the synchronization task, the destination server, the share folder
being backed up, the last time the synchronization was performed, whether or not the task
was completed successfully, if the task has a schedule assigned and the current status of the
backup job. You can also set a universal
bandwidth limit on all tasks using the “Bandwidth
Setting” drop-down to limit the bandwidth used
for synchronization tasks.
Note: You can start or stop a
synchronization job at any time by clicking
beside that task in the “Action” column
3-Administering the MaxNAS R8
