WR1500 4-Port Wireless DSL/Cable Router
®
16
2.2 Accessing the WR1500 Wireless Router Web Confi guration Utility - Continued
Step 7. You should now see the MAIN MENU screen.
The WR1500 Wireless Router automatically times out after fi ve minutes of inactivity.
Simply log back into the WR1500 Wireless Router if this happens to you.
2.3 Resetting the WR1500 Wireless Router
The WR1500 ships with an internal IP address of 192.168.1.1, which certain cable/DSL
modems may also utilize. If your cable/DSL modem has the same IP address as the WR1500
(192.168.1.1) you will not be able to connect during setup. ParkerVision has already performed
this procedure on your WR1500, however, IF YOU RESET the WR1500 to factory defaults you
will need to repeat the following procedure.
Please reference “Step 2” in the WR1500 Quick Start Guide for the following process:
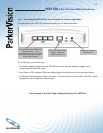
Step 1. Ensure the cable/DSL modem is not connected to the WR1500, if it is,
disconnect it now.
Step 2. Power the WR1500 by plugging the adapter into a surge-protected electrical
outlet.
Step 3. Connect the provided Ethernet cable into port 1 on the WR1500 and the other
end of the cable into your computer’s Ethernet port.
Step 4. Reset the WR1500 by depressing the Reset button (located on the back of the
unit) using a paper clip or pen until the system light on the top of the unit begins to
fl ash red. Once the system light begins to fl ash red, release the Reset button.
Step 5. After reset, the system light will turn green indicating normal operation.
Please reference “Step 3” in the WR1500 Quick Start Guide to prepare your computer to
connect to the WR1500.
Step 1. Launch your web browser.
Step 2. Type http://192.168.1.1 in the Address fi eld of the web browser, and press enter
on your computer.
Step 4. The WR1500 Web Confi guration Utility will load. Type the password 1234 in
the Password box and hit enter to log in to the router.
Step 5. The main menu options are located on the left side of the screen. Click
Advanced to open its submenus; the System screen will load. Click LAN,
located underneath the Advanced menu, to proceed.
Continued next page


