


WR1500 4-Port Wireless DSL/Cable Router
®
144
18.1.2 Procedure To Confi gure Menu 1 - Continued
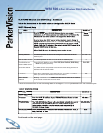
Step 2.
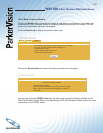
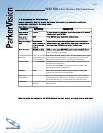
Fill in the required fi elds. Refer to the table shown next for more information about
these fi elds.
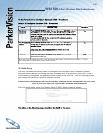
Menu 1 General Setup
FIELD
DESCRIPTION
DESCRIPTION
EXAMPLE
System Name
Choose a descriptive name for identifi cation purposes. This name
can be up to 30 alphanumeric characters long. Spaces are not
allowed, but dashes”-” and underscores “_” are accepted.
WR1500 Wireless
Router
Domain Name
Enter the domain name (if you know it) here. If you leave this fi eld
Enter the domain name (if you know it) here. If you leave this fi eld
blank, the ISP may assign a domain name via DHCP. You can go to
menu 24.8 and type “sys domainname” to see the current domain
name used by your gateway.
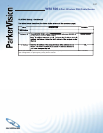
If you want to clear this fi eld just press the [SPACE BAR]. The domain
If you want to clear this fi eld just press the [SPACE BAR]. The domain
name entered by you is given priority over the ISP assigned domain
name.
parkervision.com
First System DNS
First System DNS
Server
Second System
DNS Server
Third System DNS
Server
Press [SPACE BAR] to select
Press [SPACE BAR] to select
From ISP, User Defi ned
From ISP, User Defi ned
or
None
and
press [ENTER].
From ISP
From ISP
IP Address
Enter the IP addresses of the DNS servers. This fi eld is available
Enter the IP addresses of the DNS servers. This fi eld is available
when you select User-Defi ned in the fi eld above.
N/A
N/A
Edit Dynamic DNS
Edit Dynamic DNS
Press [SPACE BAR] to select
Press [SPACE BAR] to select
Yes
and press [ENTER] to confi gure
and press [ENTER] to confi gure
Menu 1.1 - Confi gure Dynamic DNS
(discussed next).
No
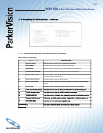
When you have completed this menu, press [ENTER] at the prompt “Press ENTER to Confi rm...” to save your
When you have completed this menu, press [ENTER] at the prompt “Press ENTER to Confi rm...” to save your
When you have completed this menu, press [ENTER] at the prompt “Press ENTER to Confi rm...” to save your
When you have completed this menu, press [ENTER] at the prompt “Press ENTER to Confi rm...” to save your
When you have completed this menu, press [ENTER] at the prompt “Press ENTER to Confi rm...” to save your
confi guration, or press [ESC] at any time to cancel.
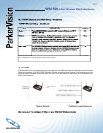
18.1.3 Procedure to Confi gure Dynamic DNS
If you have a private WAN IP address, then you cannot use Dynamic DNS.
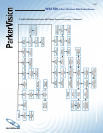
Step 1.
To confi gure Dynamic DNS, go to
Menu 1
-
General Setup
and select
Yes
in the
Edit
Dynamic DNS
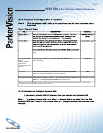
fi eld. Press [ENTER] to display Menu 1.1— Confi gure Dynamic DNS as shown on the
next page.