


Pelco Manual C1000M-B (1/96) 35
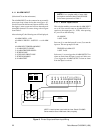
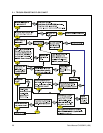
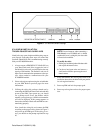
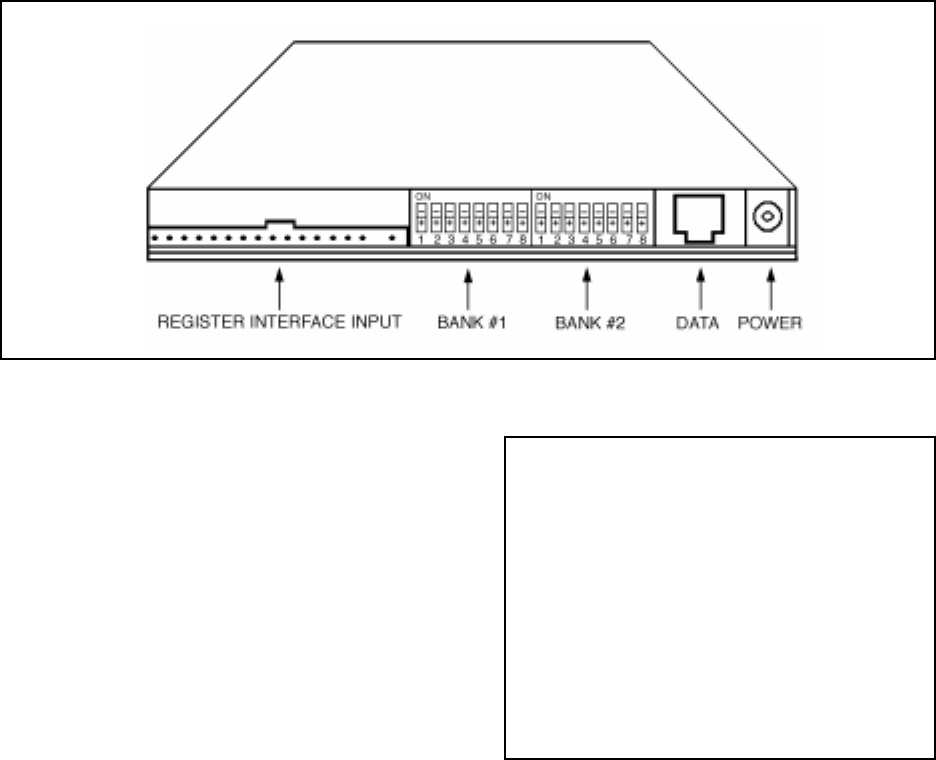
Figure 9. ICI1000PIM Switch Settings
ICI1000PIM INSTALLATION/
TROUBLESHOOTING GUIDELINES
Listed below are some simple troubleshooting steps at
your disposal. Following these steps will ensure that
your Inter-Check P.O.S. unit is communicating correctly
with your ICI1000PIM module.
1. Always execute a PIM DEFAULT LOAD (DL) on
your Inter-Check unit. Pelco suggests the use of
the Default Load even if your installation does not
require a PIM module. The Default Load sets all
Inter-Check communication parameters to the spe-
cific values needed to communicate with your
ICI1000PIM module.
2. Select cash register options using the switch banks
on your PIM. Refer to previous pages for more
information.
3. Utilizing the wiring kit, perform a bench test by
connecting the PIM to the Inter-Check unit and then
power up the PIM. Upon power-up, you should
see a prompt scroll across the monitor which
matches your register type. A PIM version number
will also be displayed. If this prompt appears on
the monitor, the Inter-Check unit and PIM are com-
municating properly.
Now, install the wiring kit and connect the PIM
according to the proper wiring shown in Figure 2
and power up the PIM again. If the wiring is cor-
rect, you should see the prompt explained in step
#3.
NOTE: In rare instances when connecting a
PIM directly to an ICI1000S unit is desired
(without the use of a wiring kit), the data cable
will need to be modified.
To modify the cable:
a. Slit the gray insulation jacket of the data cable
and expose the internal wires.
b. Cut the red and green wires and remove a
small section of each to prevent against acci-
dental contact.
4. Install the PIM into the cash register. Refer to the
installation instructions included with your particu-
lar cash register interface.
5. Power-up PIM and look for prompt again.
6. Power-up cash register and test for proper opera-
tion.