54
Chapter 6Registering and Editing Locations NAVI
1 Check that no disc is inserted, and insert
your CD-R (-RW) to the disc loading slot.
2 Touch [Picture], and then touch [Import
from Disc].
The list of the pictures stored in the
CD-R (-RW) is displayed.
❒ Touching an option other than [Import
from Disc] allows you to select an image
stored on the hard disk drive.
3 Touch a picture you want to set.
❒ To cancel displaying the picture, select
[No Picture].
4 Touch [Yes].
On this screen, you can select the following
items:
[No]:
Select when you want to change to another
picture. Return to Step 3.
Selecting sound
1 Touch [Sound].
2 Select the desired sound.
❒ To turn off the sound, select [No Sound].
3 Touch [Sound] to hear the sound.
4 Touch [Set].
Changing the position of locations
1 Touch [Modify Location].
The map of the selected area and its sur-
roundings appears.
2 Touch the screen to change its position,
then touch [OK].
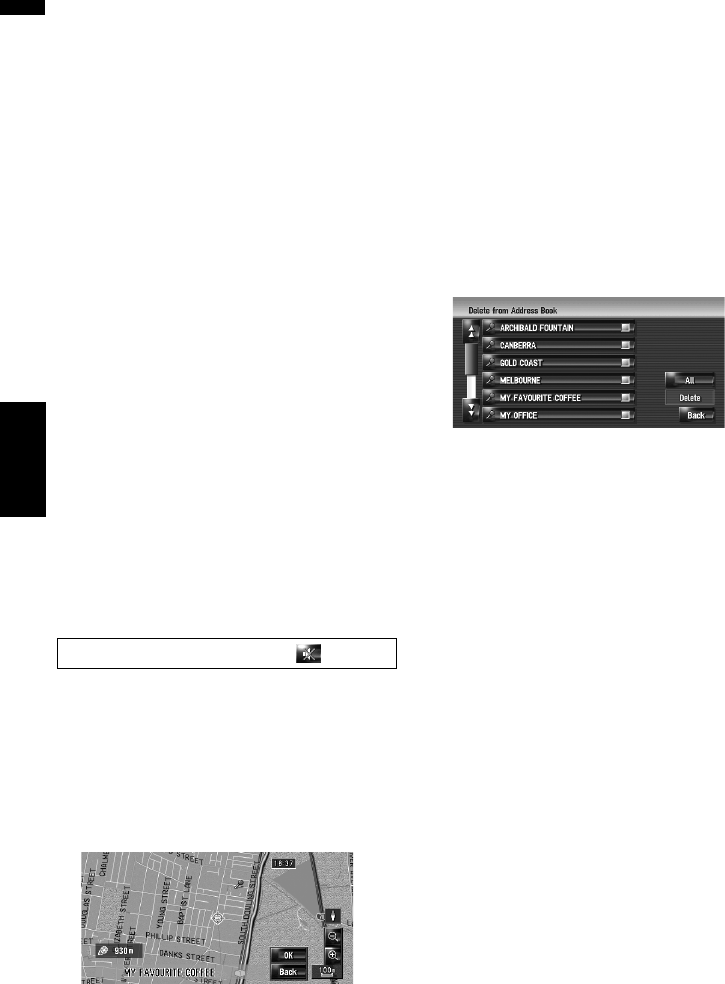
Deleting the entry in “
Address
Book
”
Items registered in the Address Book can be
deleted. All entries of the data in the Address
Book can be deleted at once.
1 Touch [Destination] in the navigation
menu, then touch [Address Book].
2 Touch [Delete].
“Delete from Address Book” screen appears.
3 Select the location you want to delete.
A tick mark appears by the selected location.
On this screen, you can select the following
items:
[All]:
Selects all entries.
[None]:
Displayed when all locations are selected.
Cancels all selected locations.
4 Touch [Delete].
5 Select [Yes].
The data you selected is deleted.
Alternative option:
[No]:
Cancels the deletion and returns to Step 3.
❒ Because deleted data cannot be restored,
take extra care not to delete by mistake.
No sounds can be output during .


