


Chapter 2: Installation and Configuration
30
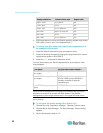
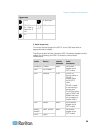
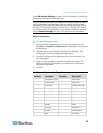
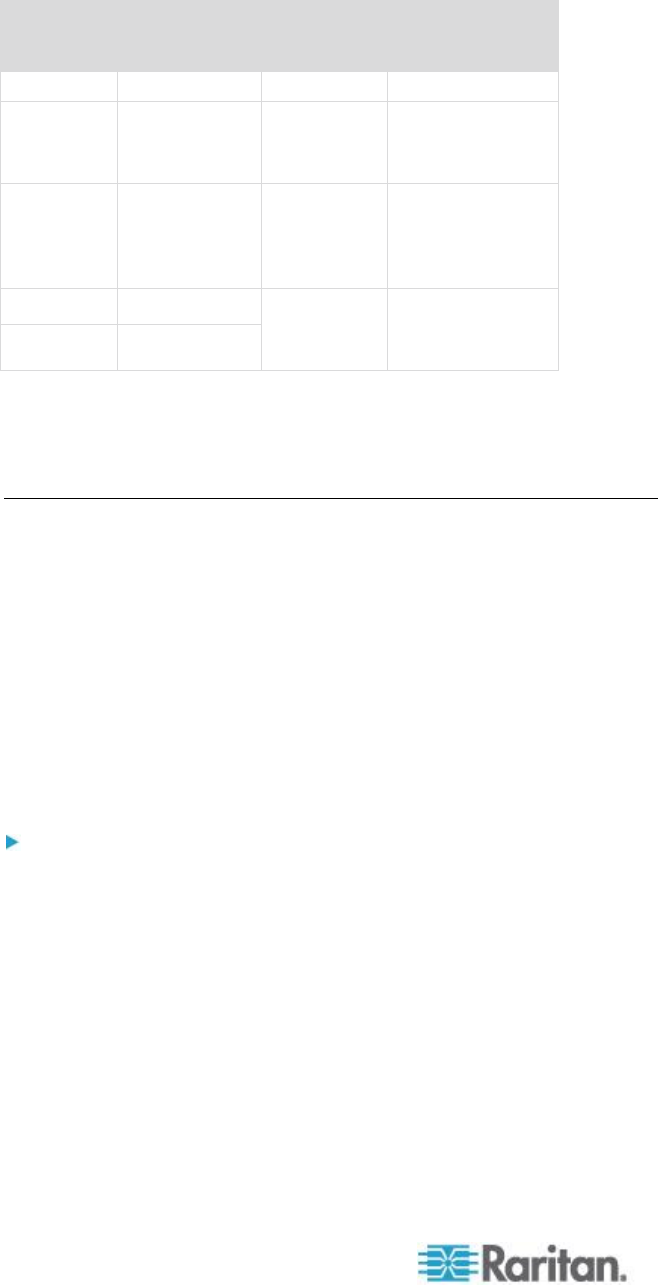
Vendor
Device
Console
connector
Serial
connection
Graphics
Sun
™
SPARCStation
DB25F
ASCSDB25M
adapter and a
CAT 5 cable
Sun
Netra T1
RJ-45
CRLVR-15 cable;
or CRLVR-1
adapter and a
CAT5 cable
Sun
Cobalt
DB9M
ASCSDB9F
adapter and a
CAT 5 cable
Various
Windows NT
®
Go to the Support page on Raritan's website (www.raritan.com) to obtain
a list of commonly used cables and adapters.
Step 4: Configure the KSX II
The first time you power up the KSX II device, there is some initial
configuration that you need to perform through the KSX II Local Console:
Change the default password.
Assign the IP address.
Name the KVM target servers.
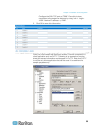
Changing the Default Password
The KSX II ships with a default password. The first time you start the
KSX II you are required to change that password.
To change the default password:
1. Power on the KSX II using the power switch(s) at the back of the
unit. Wait for the KSX II unit to boot. (A beep signals that the boot is
complete.)
2. Once the unit has booted, the KSX II Local Console is visible on the
monitor attached to the KSX II local port. Type the default username
(admin) and password (raritan) and click Login. The Change
Password screen is displayed.
3. Type your old password (raritan) in the Old Password field.
4. Type a new password in the New Password field and retype the new
password in the Confirm New Password field. Passwords can be up
to 64 characters in length and can consist of English, alphanumeric
characters as well as special characters.