CHAPTER 3: RARITAN REMOTE CLIENT (RRC) 21
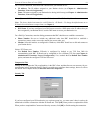
For a TCP/IP Connection, select how RRC should locate your Raritan device:
• IP Address: The IP address assigned to your Raritan device (see Chapter 4: Administrative
Functions, Network Configuration).
• Name: The name assigned to your Raritan device during initial setup (see Chapter 4: Administrative
Functions, Network Configuration).
Note: If dynamic DHCP addressing is used for IP-Reach, use “Find IP-Reach by Name.”
Note: The factory default unit name for each IP-Reach is <IP-Reach>. To change the default name on an
IP-Reach unit and institute a unique name, see Chapter 4.
• DNS Name: If you have configured your DNS server to resolve a DNS name to the IP address that you
have assigned to your Raritan device, use this DNS name to access your Raritan device.
For a Dial-Up Connection, enter the dialing parameters that RRC should use to establish a connection:
• Phone Number: Be sure to include any additional codes that RRC should dial to establish a
connection (country codes, area codes, outside line access codes, etc.)
• Modem: Select the modem, as configured in Windows, which RRC should use to dial and connect to
your Raritan device.
Select a TCP Port to use:
• Use Default Port Number: IP-Reach is configured by default to use TCP Port 5000 for
communicating with RRC. IP-Reach can be configured to use a different TCP Port (see Chapter 4:
Administrative Functions, Network Configuration); if so, uncheck the Use Default Port Number
option, and enter the configured TCP Port to be used.
Compression Tab
Settings in the Compression Tab are adjustable via the RRC client, and therefore are not necessary for pre-
configuration in the Connection Profile. Should you wish to pre-configure these settings, however, refer to
the section in this chapter labeled, Connection and Video Properties.
Security Tab
If you have configured your IP-Reach unit to use a private group key, you must enter it here in order to be
authorized to initiate a connection with that IP-Reach unit. Click [OK] when you have completed the fields.
When you have completed the Connect and Security screens, click [OK] to finish creating the connection.


