78
Chapter 5: Maintenance
NOW PROCESSING. .
5-2 Cleaning Using the Cleaning Kit
10
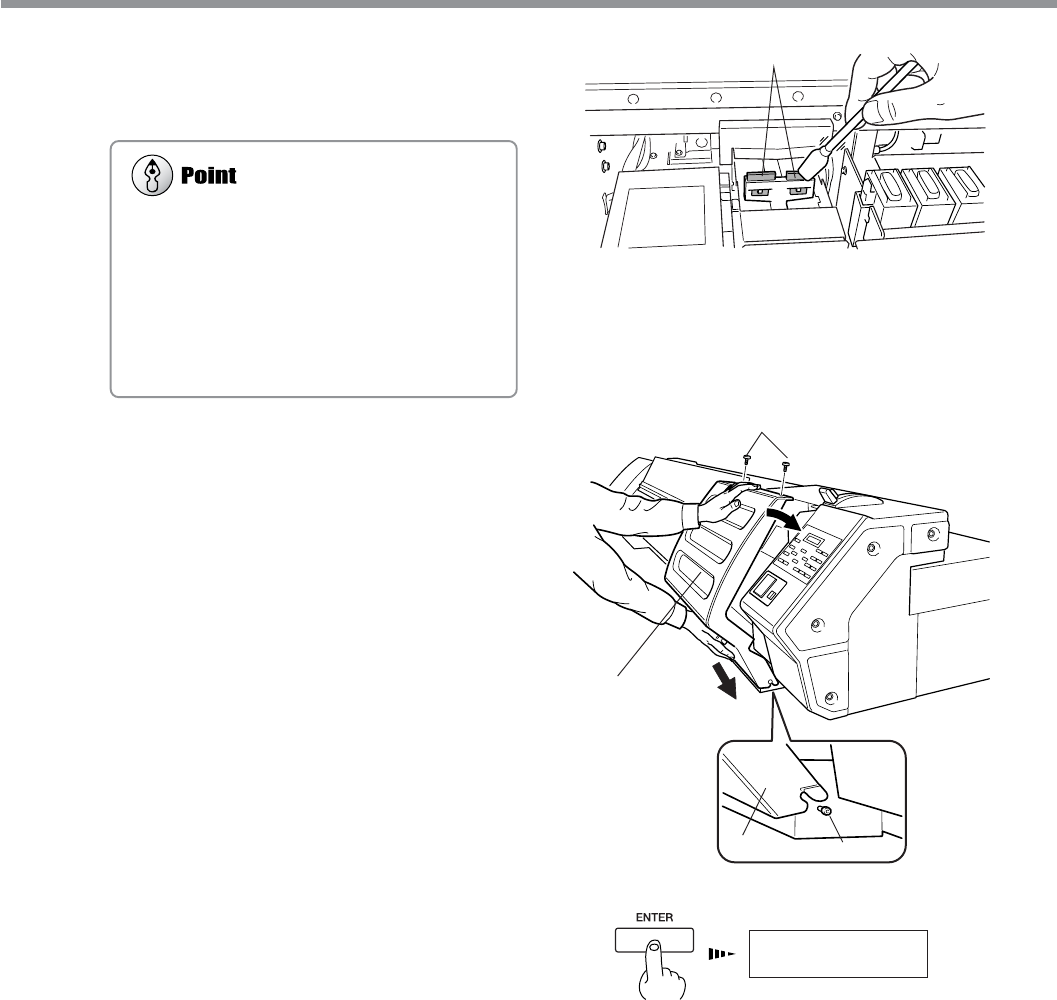
Clean the wiper. Use a cleaning stick to wipe
away any buildup of dust and grime from the
wiper.
11
Attach the left and right covers and secure them
closed by tightening the screws.
12
Press the [ENTER] key.
The screen shown in the figure appears, the print heads
return to the standby position, and head cleaning starts
automatically. After cleaning has finished, switch off the
sub power.
13
Again press the [POWER] key to switch on the
sub power.
14
Load media, and carry out a printing test.
Examine the results of the printing test and make sure
that all dots are printed attractively. If necessary perform
head cleaning to make the dots clean and even.
Replacing the Wiper
If the message [REPLACE WIPER] appears on the
display, replace the wiper with a new one. As a rule
of thumb, the message prompting you to replace
the wiper appears when cleaning has been per-
formed 500 times (with [ALL] selected for head
cleaning). For information on how to replace the
wiper, see "5-3 Replacing the Wiper."
Wipers
Screws
Cover
Engage the covers on
the hooks to install.
Cover
Hook


