Chapter 24 - Configuring The DHCP server
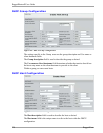
5) Set default routers to 192.168.1.1 and save it.
6) Click 'add an address pool' to the subnet.
7) Set the address range to 192.168.1.102 to 192.168.1.102.
8) Click 'Create'.
9) Edit the pool by clicking on the link for the pool with address range
192.168.1.102 - 192.168.1.102.
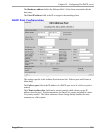
10) Click 'add an option82 client'.
11) Give the client a unique alpha numeric name (for example client0102).
12) Set the remote id to the switch MAC address (00:0A:DC:11:22:00 in this
case).
13) Set the circuit id to the switches circuit id identifier to the port (00:01:00:02
for VLAN 1 port 2 on a RuggedCom switch).
14) Click 'Create'.
15) Click 'Save'.
16) Repeat steps 6) through 15) for clients 192.168.1.103 changing the pool
address range and circuit id.
17) Repeat steps 6) through 15) for port 4 using the address range 192.168.1.151
to 192.168.1.200 and the circuit id for port 4.
18) Restart the DHCP server or apply changes.
Multiple Subnets On Separate VLANs Using Option82 On One Switch
In this example the eth1 interface is provided with IP address 192.168.1.1/24
A switch connected to eth1 and using address 192.168.1.2/24
The switch port 1 is connected to the router while its ports 2 through 8 provide DHCP
relay support. The switch has its DHCP relay server address set to router's address
192.168.1.1. The switch has all ports in VLAN 1. The switch base MAC address is
00:0A:DC:11:22:00.
The switch port 2 is on vlan2 using subnet 192.168.2.0/24 and should assign
addresses 192.168.2.101 to 192.168.2.200 and default gateway 192.168.2.1.
The switch port 3 is on vlan3 using subnet 192.168.3.0/24 and should assign
addresses 192.168.3.101 to 192.168.3.200 and default gateway 192.168.3.1.
The switch port 4 is on vlan4 using subnet 192.168.4.0/24 and should assign
addresses 192.168.4.101 to 192.168.4.200 and default gateway 192.168.4.1.
1) Enable eth1 in the 'Edit Network Interfaces' menu.
2) Add a new subnet, and configure it for network address 192.168.1.0 with
netmask 255.255.255.0.
3) Save it.
4) Add a new shared network.
5) Name the shared network (for example "eth1") and select the subnet
192.168.1.0 to be included in the shared network.
RuggedCom 223


