


Disassembly / Reassembly Procedures
20
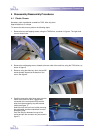
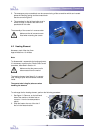
4-3 Rear Panel
Necessary tools: Phillips crosshead screwdriver (medium), open-ended spanner 8mm, and knife.
Approximate time: 10 minutes.
Perform the following steps:
1. Remove the seven self-tapping screws from the rear panel. Take care not to loose the serrated
washers and the 3 plastic straps.
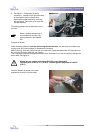
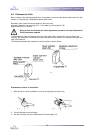
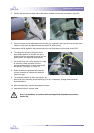
2. See figure 13: carefully pull the rear panel backward a bit; next swing the rear panel a quarter turn
away from the machine.
3. Disconnect the 3 fast-on connectors from the appliance inlet (see white arrows in figure 13).
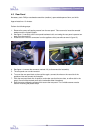
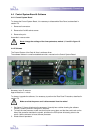
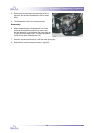
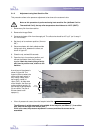
4. See figure 14: remove the connector marked J10 (to disconnect the footswitch).
5. The rear panel can now be removed.
6. To mount the rear panel back to the machine again, connect the wires on the rear side of the
appliance inlet and connect the footcable.
7. Push the rear panel back into its position, and make sure that the two slots, on either side in the
panel, fit around the two bent parts at the underside either framesheet.
8. Refit the seven selftapping screws which secure the rear panel. The 3 middle screws are also
used for mounting the plastic straps.
fig. 13
fig. 14