


Adjustment Procedures
29
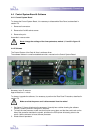
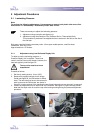
5-2 Roller Nip
Note: to perform the following adjustments, it is necessary to remove both plastic side covers first.
See section 4-1: Disassembly / Reassembly Plastic Side Covers.
Necessary tools: Allen Key 4mm, a set of metric thickness gauges.
Approximate time: 5 minutes
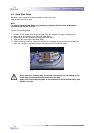
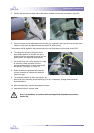
Note: the top roller must be at room temperature, before this procedure is being performed.
1. Set the roller opening to its minimum position by pushing and turning the nip setting knob fully
counter-clockwise. (nip 0mm)
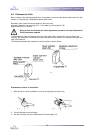
2. Loosen the bolts that hold the adjustment strip in such a way, that the strip can be moved up- and
downward, but does not slide downward by its own weight.
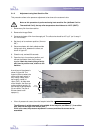
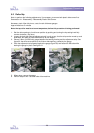
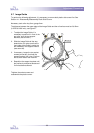
3. Place a 0.6mm (0.0236 inch) gauge between the bearing housing and the adjustment strip. See
figure 30: the white arrow points to the 0.6mm wide opening, caused by the gauge.
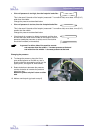
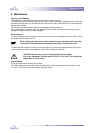
4. Push the adjustment strip upward against the gauge (figure 30) and fasten the M5 bolts while
leaving the gauge in place. See figure 31.
5. When done, remove the gauge.
6. Perform steps 2 thru 5 at either side of the machine.
fig. 31
fig. 30
push strip
upward