


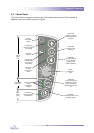

Disassembly / Reassembly Procedures
22
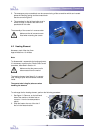
4-5 Solid State Relay
Necessary tools: medium flat-head screwdriver, Allen key 3 mm.
Approximate time: 20 minutes.
Note:
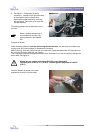
To remove the Solid State Relay, it is necessary to perform the Rear Panel disassembly
procedure (see Section 4-3) first.
Perform the following steps:
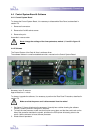
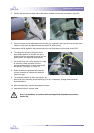
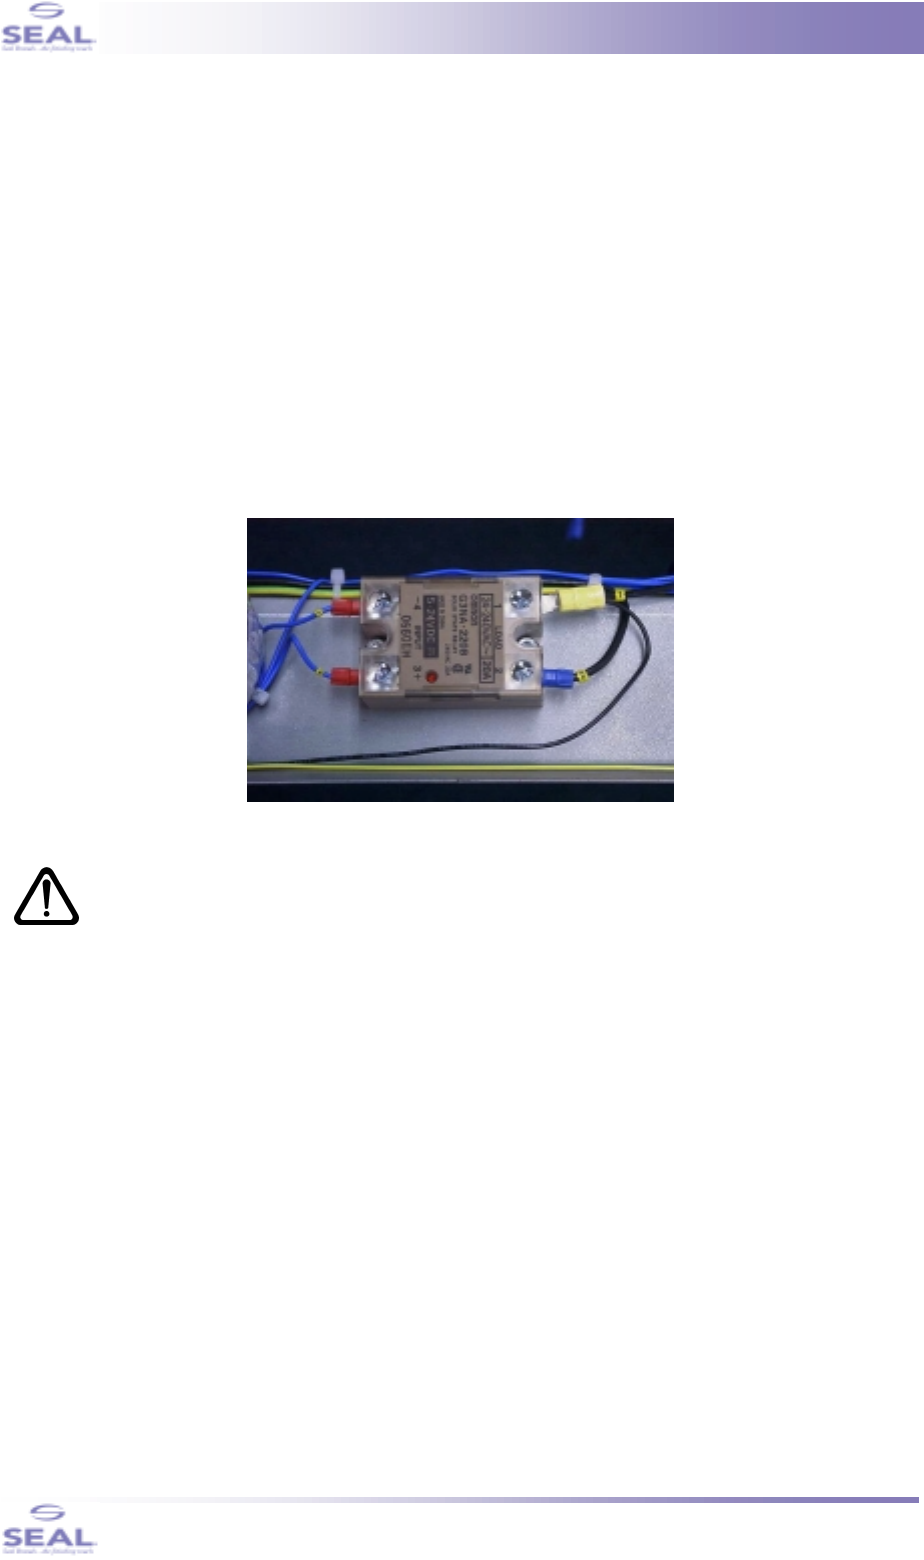
1. Loosen all four screws that clamp the wires. They are marked 1 through 4. See figure 16.
2. Bend the wires a bit away from the Solid State Relay.
3. Remove the two M4 bolts that hold the Solid State Relay.
4. Now you can remove the Solid State Relay.
5. When mounting the Relay, make sure that the four clamping screws and the two M4 bolts are
tight. Don’t forget the serrated washers that belong under the M4 bolt heads.
Note: make sure, that the relay is mounted in the proper way: the coding on the
wires must correspond with the numbers on the relay.
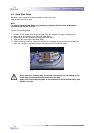
Apply a bit heat-conductive paste on the underside of the Solid State Relay, and
spread it out a bit.
fig. 16