BioOptix™ 10
Section 3 Operation
3-8
3.6.1 Setting up the
Experiment
Before proceeding, determine which BioOptix 10 channel posi-
tions will be used during the purification run. Channels that will
be in use require that the corresponding rows in the table be
completed. Note that to use these positions they should have
samples prepared (section 3.1) and columns installed (3.2).
Table rows for unused channels must remain empty.
To set up the experiment:
1. Position the cursor in the Sample Name table cell of the
first channel position in use. Enter a descriptive name for
the sample. This activates the channel for use in the exper-
iment.
Because the Sample Name also is used as a filename for
post-run data, the text you enter in this field must be a
Windows-compatible file name.
2. Advance the cursor to the next cell to the right.
BioOptix 10 completes the remaining cells in the row using
the settings from the method file as defaults.
3. Repeat steps 1 and 2 for all channel positions that will be
in use.
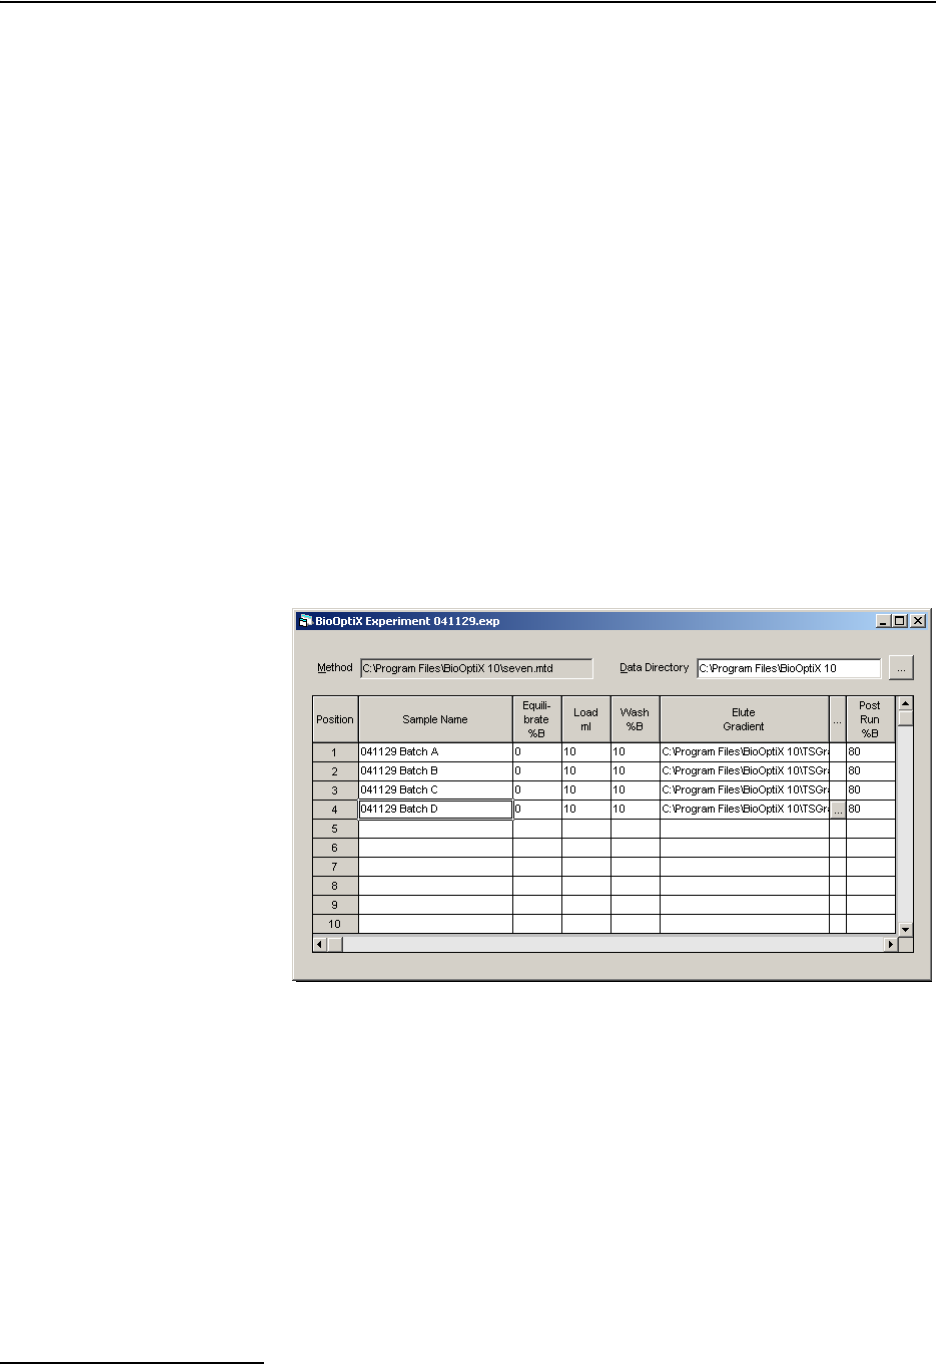
The table now is populated with default settings for each channel
position in use.
Figure 3-7 Experiment File
3.6.2 Editing the Experiment The table can be edited to create unique purification parameters
for each channel. To edit any cell in the table, position the cursor
in a cell and enter the new value. You can also select different
gradient files by clicking on the [...] button and browsing for the
new file. When editing the table note the following:
• Load type values (such as the “Load Column in Figure
3-7) must be a multiple of the stroke volume. Stroke
volume is discussed in section 2.3.1.
• If selecting a different gradient file, note that the total
volume pumped be the same for all channels in the
experiment.


