7-12
INSTALL THE SOFTWARE
Installing onto Windows 95/98/Me/NT4.0/2000 (Parallel interface)
Before starting the installation, make sure the USB or parallel interface cable is not connected to the MFP.
1
Insert the supplied CD-ROM into your CD-ROM drive.
2
Double-click “My Computer” ( ), and then double-click the CD-ROM ( ) icon.
When any of “Hardware Found”, or “Found New Hardware Wizard” messages appear
during the software installation, be sure to click the “Cancel” button.
3
Double-click the “setup” ( ) icon.
If the language selection screen appears after you double click the “setup” icon, select the
language you wish to use and click the “Next” button. (Normally, the correct language is
selected automatically.)
4
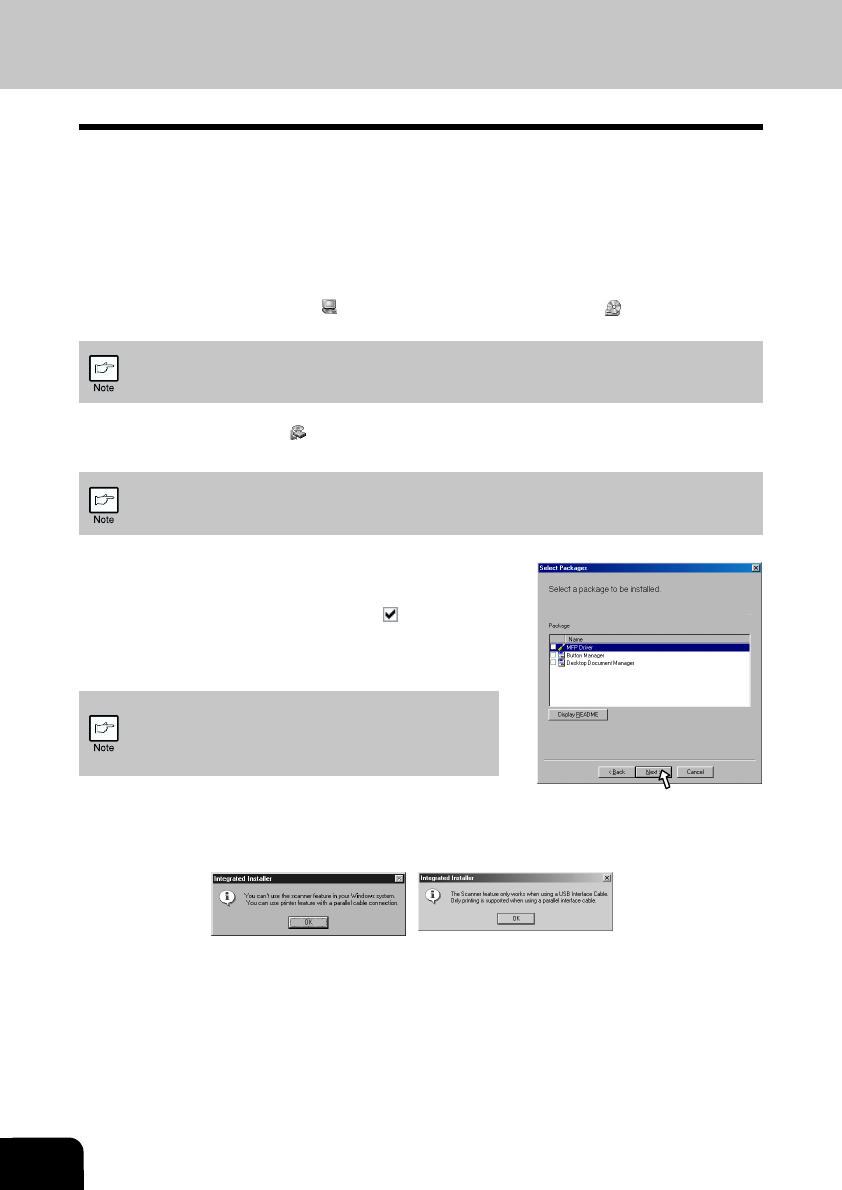
Select the software packages to be installed, and then
click the “Next” button.
The software packages with checkmark ( ) on the list on
the screen will be installed.
Click the “Display README” button to show the information
on the selected package.
In Windows 95/NT 4.0, “Button Manager” does not
appear. In Windows 98/Me/2000, do not select the
“Button Manager” checkbox. because this is not
supported when using the parallel interface.
5
The next screen appears. Make sure that the parallel interface cable is not connected, and
click “OK”.
6
Check the contents of the package on the screen, and then click the “Start” button.
The software packages to be installed will be displayed on the screen. If inappropriate packages are
displayed, click the “Back” button to select only appropriate software packages.
Windows 95/NT 4.0 Windows 98/Me/2000


