


2. SYSTEM MODE EO13-33002
2.5 Sensor Adjustment
2-59
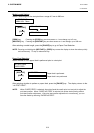
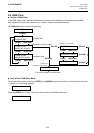
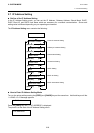
How to Enter the Sensor Adjustment Mode
While pressing the [FEED] and [PAUSE] keys at the same time, turn on the printer. Hold both keys until
the “<1>DIAG. Vx.x” Message appears.
Press the [FEED] key 4 times. The printer is at the start of the Sensor Adjustment menu.
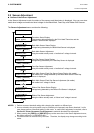
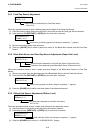
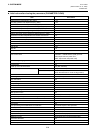
2.5.1 Thermistor Status Display
When “<5>SENSOR ADJ.” appears, press the [PAUSE] key to display the following.
Press the [PAUSE] key to show a real-time black mark sensor status.
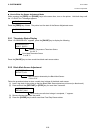
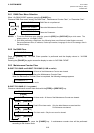
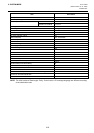
2.5.2 Black Mark Sensor Adjustment
Follow the procedure below to store a media level voltage of the black mark sensor.
(1) Load a tag stock in the printer so that the Black Mark Sensor detects a print area (no black mark).
(2) Press and hold the [RESTART] or [FEED] key for more than 3 seconds.
(3) Remove the tag stock from the printer.
(4) Press the [PAUSE] key to show a real-time Feed Gap Sensor status.
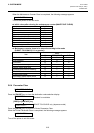
<1>DIAG. Vx.x
<5>SENSOR ADJ.
<5>SENSOR ADJ.
[REFLECT] 2.8V*
When storing a media level voltage is completed, “*” appears.
<5>SENSOR ADJ.
[H]20°C [A]22°C
Print Head Thermistor Status
0 to 86 °C
Ambient Temperature Thermistor Status
0 to 86 °C
<5>SENSOR ADJ.
[REFLECT] 3.8V
Real-time status detected by the Black Mark Sensor
0.0V to 5.0V