


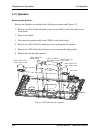


4.13 System Board 4 Replacement Procedures
Satellite/E200/E205 Maintenance Manual 4-39
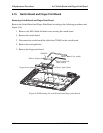
Installing the System Board
Note: Be careful of the Kill switch knob position for the kill switch. It can be damaged
when installing the system board. Make sure its position is same as kill switch on system
board..
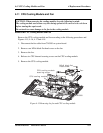
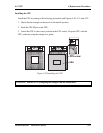
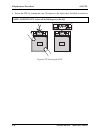
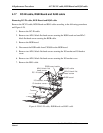
Install the System Board according to the following procedures and figure 4-23, 4-24.
1. Seat the system board in the correct position.
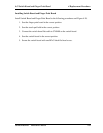
2. Secure the system board with three M2x3 black flat head screws.
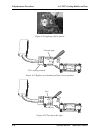
3. Connect the audio board flat cable from CN201 on system board.
4. Connect the DC-IN cable from CN6000 on system board.
5. Connect the MMB board flat cable from CN200 on system board.
6. Restore the normal top cover placement.
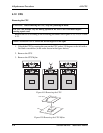
13. Connect the light sensor cable from CN202 on system board.
14. Connect the RGB cable from CN3050 on system board.
15. Connect the RJ45 cable from CN470 on system board.
16. Connect the touch pad flat cable from CN280 on system board.
17. Connect the switch board cable from CN281 on system board.
7. Connect the finger print board cable from CN209 on system board.