


PTM 6-11 B070/B071
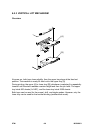
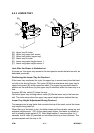
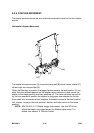
6.5.5 LOWER TRAY
[A]: Upper tray lift motor
[B]: Upper tray upper limit sensor
[C]: Upper limit switch (upper tray)
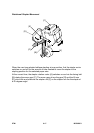
[D]: Lower tray lift motor
[E]: Lower tray paper height sensor 1
[F]: Lower tray paper height sensor 2
Just After the Power is Switched on
At power on, the upper tray moves to the start position under the feed-out slot, as
described previously.
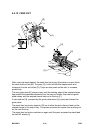
Positioning the Lower Tray for Feed-out
If the lower tray is selected for a job, the upper tray is moved away from the feed-
out slot at the start of the job. The motor [A] lifts the side fence and upper tray to
upper limit sensor [B], which stops the motor. The upper tray remains locked in
position on the side fence (by the upper tray lift solenoid) while the lower tray is in
use.
If sensor [B] fails, switch [C] stops the tray.
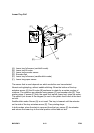
While the upper tray is being raised, motor [D] lifts the lower tray to the feed-out
slot. The motor stops when the upper tray paper height sensor detects the tray.
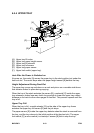
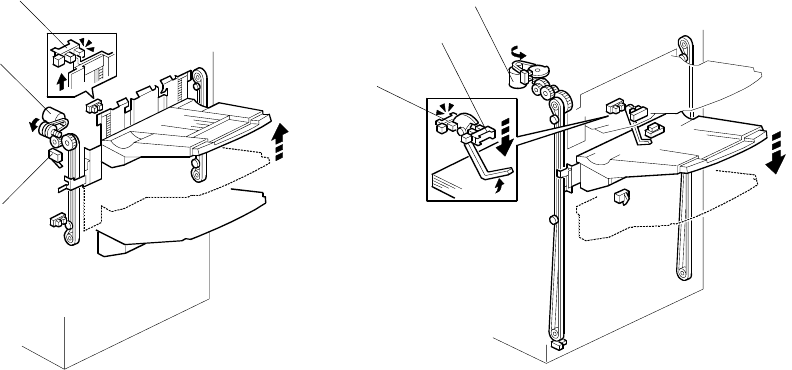
Lower Tray Height Adjustment During Feed-out
Two sensors and a long feeler that contacts the top of the stack control the lower
tray height during feed-out.
When the top of the stack is low, the feeler drops and the actuator swings up and
actuates height sensor 1 [E]. As the stack grows higher, the feeler is pushed up
until it actuates height sensor 2 [F]. After height sensor 2 remains active for 3
seconds, the lift motor [D] switches on and lowers the tray a short distance. This
process repeats until the tray is full.
B468D104.WMF
B468D103.WMF
[E]
[F]
[D]
[B]
[A]
[C]