


GL-1010 Scan Operator’s Guide 77
Scanning from the Glass
Follow these steps when scanning by placing the original on the
glass.
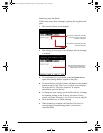
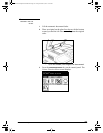
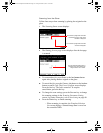
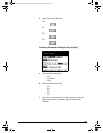
1 The Scanning Status screen displays.
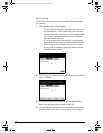
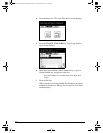
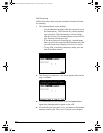
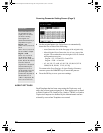
2 The Waiting for next page screen displays after the last page
is scanned.
n To scan another job, press SCAN! or the hard START button
again after placing another original on the glass.
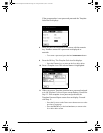
n To cancel the job, press the CANCEL JOB button or the hard FC
button to cancel a job. The Cancel Confirm screen displays.
Press the
YES key. The Job is canceled. To stop the
cancellation, press the
NO key.
n To change the scan settings, press the SETTING key to change
the scanning settings in the Scanning Parameter Setting
screen.
For further information, refer to Scan Setting on page 80.
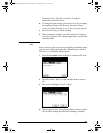
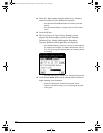
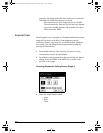
3 Press the FINISH key to finish scanning.
− When scanning is complete, the Template Selection
List screen displays. Scanned image data is saved on
the controller HDD.
The number of pages that have been
scanned is displayed.
The number of pages that have been
transferred from the copier to the
controller is displayed.
The auto detected original size is
displayed when Scan Setting for
Original size is set to AUTO.
GL-1010 Scan Operator's Guide.book Page 77 Friday, October 5, 2001 10:30 AM