Installation
2–4 TM-XDOP-01XN
Location, Mounting, and Ventilation
Use the power supply in rack-mounted applications only. The power supply is
designed to fit in a standard 19 in. (483mm) equipment rack.
Rack Mounting
To install the power supply in an equipment rack:
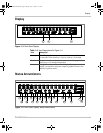
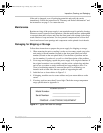
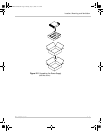
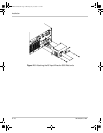
1. Open the box containing the unit. See Figure 2-2.
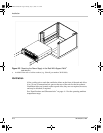
2. With the help of at least one other person, lift the unit out of its package and
slide it into an empty space in a mounting rack equipped with rails that are
rated to support the unit’s weight. See Figure 2-3.
On 12000 Watt units, remove the temporary lifting handles before installing
the unit in a rack.
3. While your assistant(s) holds the unit steady, fasten it to the rack by inserting
bolts through the mounting brackets on either side of the front panel and
securing them with a washer and nut.
4. The front panel mounting brackets are designed to prevent the unit from
sliding out of the rack, not to support its full weight. Provide adequate support
for the rear of the unit without obstructing the ventilation inlets. Use slide rails
as illustrated in Figure 2-3 or slide brackets attached to the 8-32 mounting
holes on each side of the unit. Follow the manufacturer’s instructions to install
rails or slides.
WARNING: High energy and high voltage
Ensure that the 8-32 rack mounting screws do not extend more than 1/8 in.
(3.0mm) into the sides of the power supply.
CAUTION
The power supply is too heavy for one person to safely lift and mount. To avoid
injury, ask a co-worker for assistance.
TM-XDOP-01XN.book Page 4 Monday, July 17, 2006 11:19 AM


