Scanning with the TWAIN Interface from PaperPort
88 DocuMate 252 Scanner User’s Guide
5. When scanning documents, use the Create single page items
check box as follows:
• When the check box is selected, all pages in the Automatic
Document Feeder are scanned, the TWAIN interface
closes, and each page is placed on the PaperPort Desktop
as an individual file.
• When the check box is not selected, the scanned pages are
not placed on the PaperPort desktop until you indicate the
scanning job is finished by clicking Done on TWAIN
interface then clicking Done on the PaperPort-Scan
window. Multiple pages are “stacked” on the PaperPort
desktop. Note that items scanned as .jpg files cannot be
stacked on the desktop. Please see the PaperPort User’s
Guide for more information about stacks.
6. The option Blank page is job separator is for when you load
several separate scanning jobs into the Automatic Document
Feeder at the same time. Insert a blank page between them
and each job will become a separate stack on the PaperPort
Desktop when scanning is finished.
Please see the PaperPort User’s Guide for more information
about this option.
7. Make sure the option Display scanner dialog box is selected.
If this option is not selected, the TWAIN interface will not open
when you click the Scan button. Instead, the items are scanned
with the basic PaperPort settings. Documents are scanned in
Black and White in the .pdf file format, and Photographs are
scanned in Color in the .jpg file format.
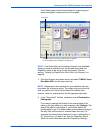
8. Click the Scan button on the Scan pane.
The TWAIN interface opens and you are now ready to scan from it.
Getting Help with the PaperPort Software
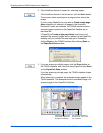
The PaperPort software includes a complete set of help topics that
answer questions about each feature of the software. To open the
Help Topics window, press the F1 key or choose PaperPort Help
from the Help menu.
You can also refer to the PaperPort Getting Started Guide and
PaperPort User’s Guide on the Disc 1 Installation CD.


