Scanning with the TWAIN Interface from PaperPort
92 DocuMate 252 Scanner User’s Guide
2. If the AutoScan feature is turned on, scanning begins.
If the AutoScan feature is not turned on, click the Scan button.
The scanner starts scanning and a progress box shows the
image.
If you’re using PaperPort to scan and its Create single page
items check box is selected, all pages in the Automatic
Document Feeder are scanned, the TWAIN interface closes,
and each page is placed on the PaperPort Desktop as an
individual file.
If PaperPort’s Create single page items check box is not
selected, the scanned pages are not placed on the PaperPort
desktop until you indicate the scanning job is finished by
clicking Done on the TWAIN interface then clicking Done on
the PaperPort-Scan window.
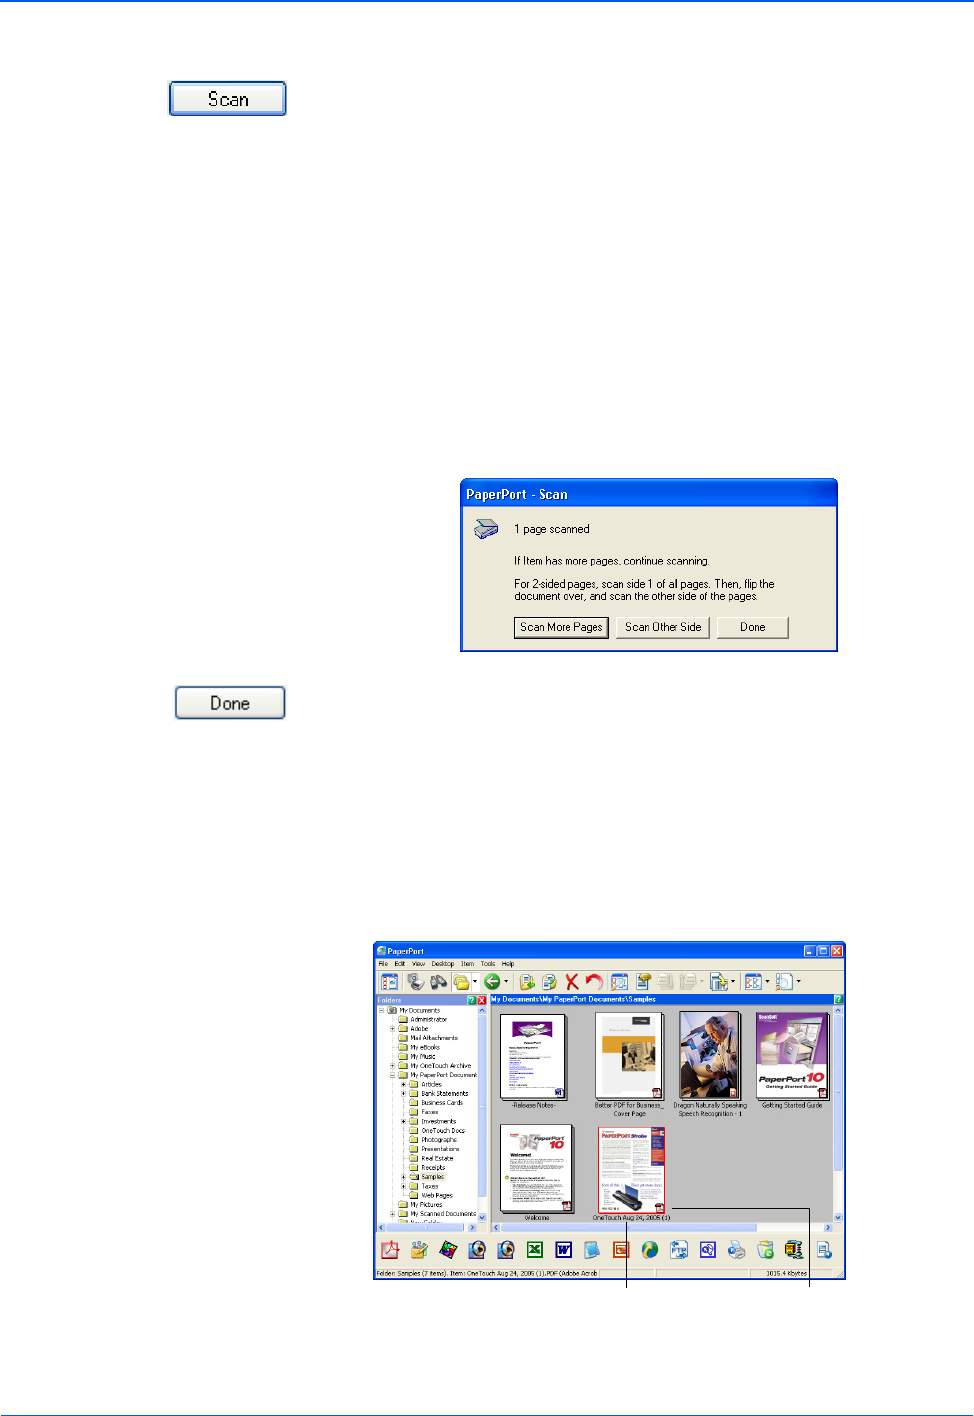
3. If you are scanning multiple pages, click the Done button on
the TWAIN interface, and if you are using PaperPort click Done
on the PaperPort-Scan window.
If you are scanning a single page, the TWAIN interface closes
automatically.
When scanning is complete, the scanned images appear in the
TWAIN software. This example shows a thumbnail image of a
scanned page on the PaperPort Desktop.
A thumbnail image of the
scanned item appears on
the PaperPort desktop.
The small icon represents
the file format, in this case
the .pdf format.
