Xerox DocuMate 3920
User’s Guide
7
Welcome
This chapter includes:
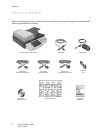
• What’s in the Box on page 8
• Setup Requirements on page 9
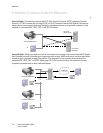
• Internet Communication Features on page 10
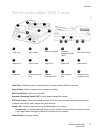
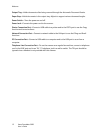
• The Xerox DocuMate 3920 Scanner on page 11
Your new Xerox scanner can quickly scan single-sided or double-sided stacks of documents with the
Automatic Document Feeder (ADF), or single items on the Flatbed glass. With this scanner you can
scan documents and send them electronically to a file server, email message, printer, fax machine, FTP
site, or website directly from the scanner. The scanner can also be connected to a computer for
scanning from software applications.
Important:
• There is no default administrator password. When you access the management options from the
LCD panel, or from the scanner’s embedded web page, you will get prompted for a user name and
password. Press or click “Login” to continue setting up the scanner features as described in the
sections. You may want to add a username and password to prevent users from changing the
scanner settings.
• To use the Fax and Copy functions, you need to connect the scanner to a USB InkJet or Laser
printer that supports PCL. Please visit the information page for your scanner at
www.xeroxscanners.com for more information.
• To use the Filing function your user account must have privileges to write to the server. Setup of
the server, and user account privileges, are outside the scope of this document. Please contact
your IT department or network administrator for this information.
• To use the Email function you must have the email server information. Setup of the email server,
and user account privileges, are outside the scope of this document. Please contact your IT
department or network administrator for this information.


