Xerox DocuMate 3920
User’s Guide
70
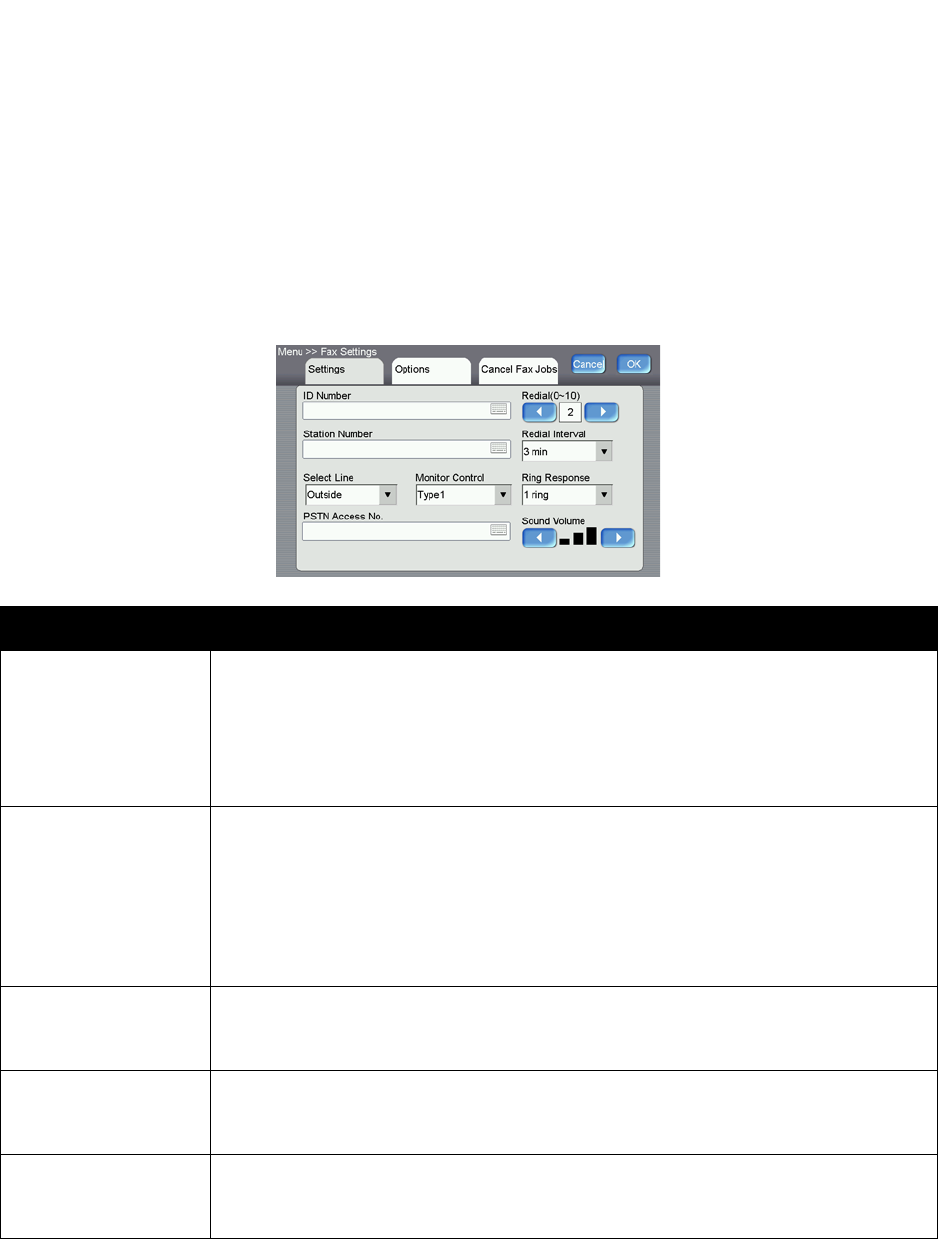
Fax Settings
Before you can send or receive faxes with this scanner, you have to configure the scanner’s fax settings.
You can access these settings from the scanner’s LCD touch screen, or from the scanner’s embedded
web page using the Network Management Tool or through a web browser.
Configuring the Fax Settings from the Scanner
Fax Settings
Option Description
ID Enter the ID of the scanner. Up to 32 characters can be entered. Normally, you can
enter your company name in this field. Touch anywhere on the “ID” field to bring up
the soft keyboard to type your text. The text in this field as well as the station number
(telephone number of the scanner), the scanner’s clock including date and time, the
receiving fax number, and page index will be printed at the top of all outgoing faxes
as header information.
Station Number Enter the telephone number of the scanner. The Station Number is the phone number
of the line connected to the built-in modem and the Station Number should be a
value not more than 20 characters. The “+” (plus) and “ ” (blank space) are supported.
The value of the station number will be printed as part of the fax header information
of all outgoing faxes.
Touch anywhere on the “Station Number” field to bring up the soft keyboard to type
your number.
Select Line Select to use the device’s fax telephone line as a direct outside line (PSTN line) or as
an extension (PABX line).
Choices are: Outside, Extension
Monitor Control Turn on Monitor Control to have the scanner monitor the telephone line during faxing.
Type1 monitors the telephone line until the DIS (Digital Identification Signal) is
detected. Type2 monitors the telephone line during communication.
PSTN Access No. Enter the number to access the PSTN (Pubic Switched Telephone Network) line if your
device’s fax telephone line is used as an extension.
For example, enter 0 or 9 in the field via the soft keyboard.
