


Xerox 4112/4127 Copier/Printer User Guide
12-3
12. Problem Solving
Machine Troubleshooting
Check the machine status for machine troubleshooting.
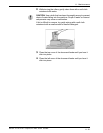
WARNING: Precision components and high-voltage power
supplies are used on the machine. Never open or remove
machine covers that are screwed shut unless specifically
instructed in the User Guide. A high-voltage component can cause
electric shocks. When opening the panels and covers that are
screwed shut to install or detach optional accessories, be sure to
follow instructions in the User Guide.
Do not try to alter the machine configuration or modify any parts.
Doing so might cause machine malfunction or fire.
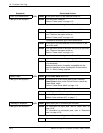
Action Refer to “Error Codes” on page 12-28.
The machine is not working
properly.
YES Action Refer to “Machine Troubleshooting” on page 12-3.
If NO, go to next symptom.
Image quality is poor. YES Action Refer to “Image Quality Problems” on page 12-8.
If NO, go to next symptom.
Trouble during copying. YES Action Refer to “Copy Troubleshooting” on page 12-13.
If NO, go to next symptom.
Trouble during printing. YES Action Refer to “Print Troubleshooting” on page 12-18.
If NO, go to next symptom.
Trouble during scanning. YES Action Refer to “Scan Troubleshooting” on page 12-22.
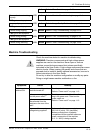
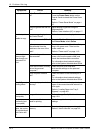
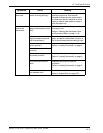
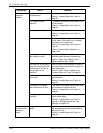
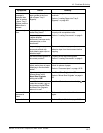
Symptoms Check Remedy
Power is not
switched ON.
Is the power switch on the
machine turned off?
Turn the power switch on.
Refer to “Power on/off” on page 1-13.
Is the power cord plugged
into the power outlet?
Turn the power switch off and then firmly
plug in the power cord. Then turn the
power switch on.
Refer to “Power on/off” on page 1-13.
Is the power cord
disconnected from the
machine or the rear of the
rack?
Is power of the correct
voltage being supplied?
Make sure that the power supply is
200 -240 V (volts), 15 A (amperes).
Make sure that power of capacity
compatible with the specified maximum
power consumption of the machine
(2.8 - 3.1 KVA) is being supplied.