DocuMate 752 Scanner User’s Guide 33
Scanning
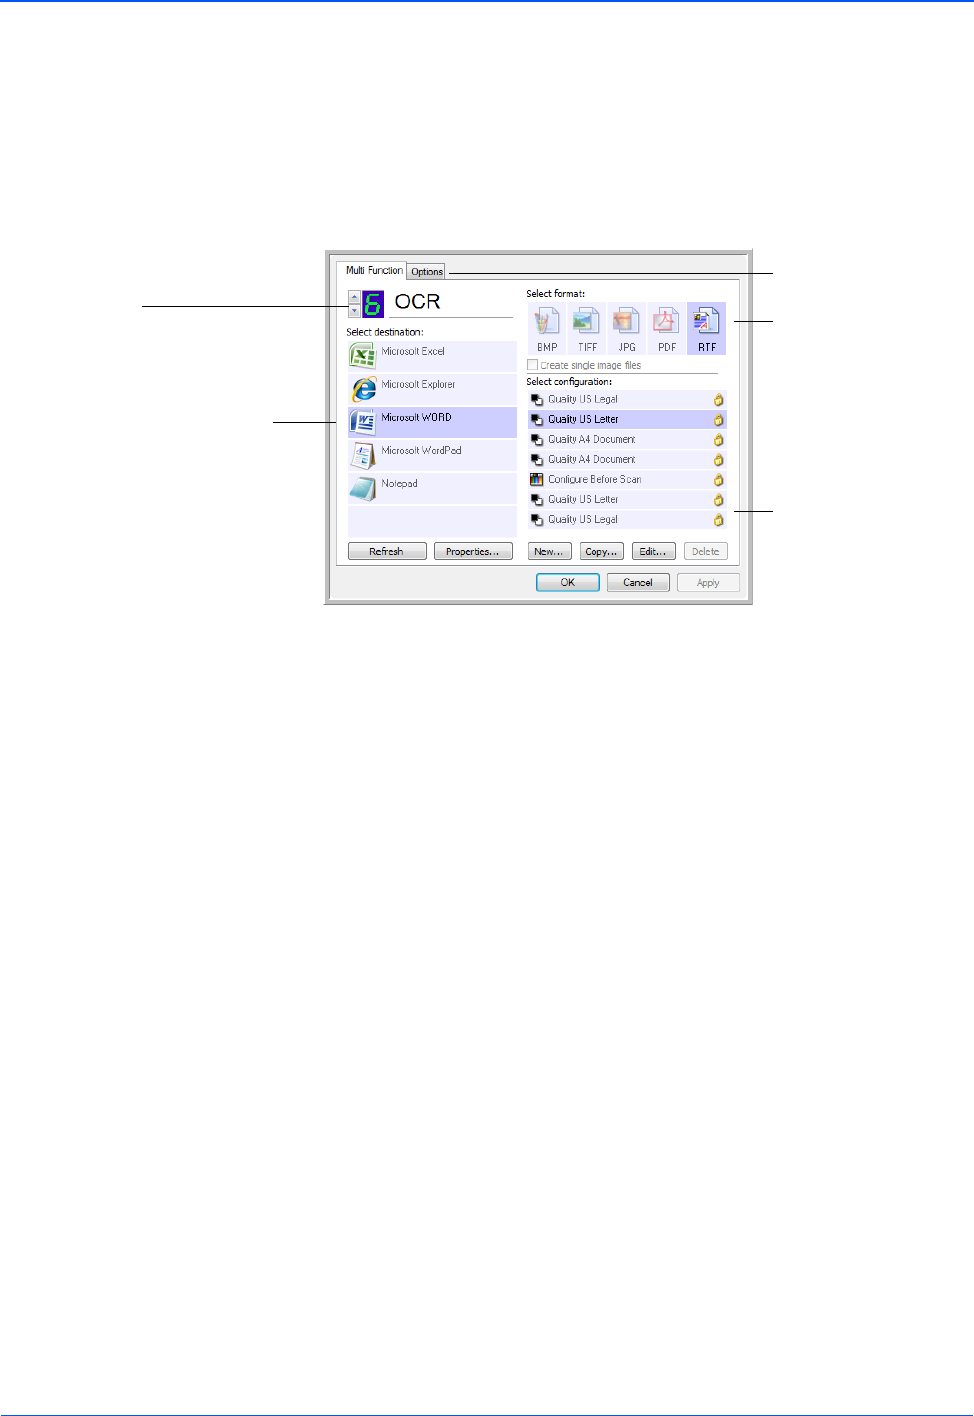
The following example of the One Touch window shows the
settings for Button 6. The button is set to scan with the scan
configuration named Quality US Letter (Duplex) then open
Microsoft Word to display the scanned image. The Format and
Page(s) option is set to scan in the RTF image format. The text on
the scanned pages will be converted by the OCR process to text
that you can edit in Word.
The settings on the One Touch Properties window are:
Select Destination—The list of applications that can open to
display the scanned image. To configure the list of available
applications, click the Options tab at the top of the dialog box and
select the desired options. See “Selecting Options for the One
Touch Properties Window” on page 50 for more information.
To make sure all of your computer’s Destination Applications are
linked to One Touch 4.0, click the Refresh button.
The Destination Application.
This is the application that
opens when you are finished
scanning.
The settings that
the scanner uses
when scanning
with the currently
selected button (in
this case button 6,
OCR).
The file format for
the images of the
scanned item.
Click to select
options.
The button number and
name.
NOTE: Some of the options on the One Touch Properties
Window (and other One Touch windows and dialog boxes) may
be “grayed out” and are not available. Grayed out options are
not appropriate for your Xerox DocuMate 752 scanner.
NOTE: Later on, if you install new software that can be used as
a Destination Application, click the Refresh button again to link
the new software to One Touch 4.0. Note that some software
installed on your computer may be incompatible with One Touch
4.0. Incompatible software will not be listed as a Destination
Application.
