


Assembling the Printer
8
❖
Setting Up Guide
5
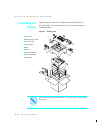
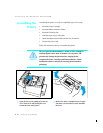
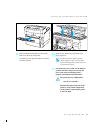
Remove the Photoconductor / Drum from its
wrapper and insert it vertically into the slots
on the sides of the printer’s interior.
The photosensitive drum is easily
damaged. Do not touch it or expose it to
direct light.
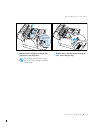
6
Pivot the Photoconductor / Drum down toward
the back of the printer until it falls into place
horizontally.
7
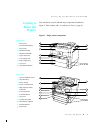
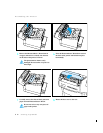
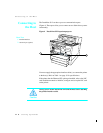
Carefully remove the sheet of black protective
paper from the Photoconductor / Drum.
Be sure not to leave any torn pieces of
paper in the printer.
8
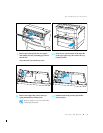
Rotate the fuser cover to the rear.