


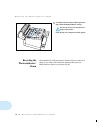

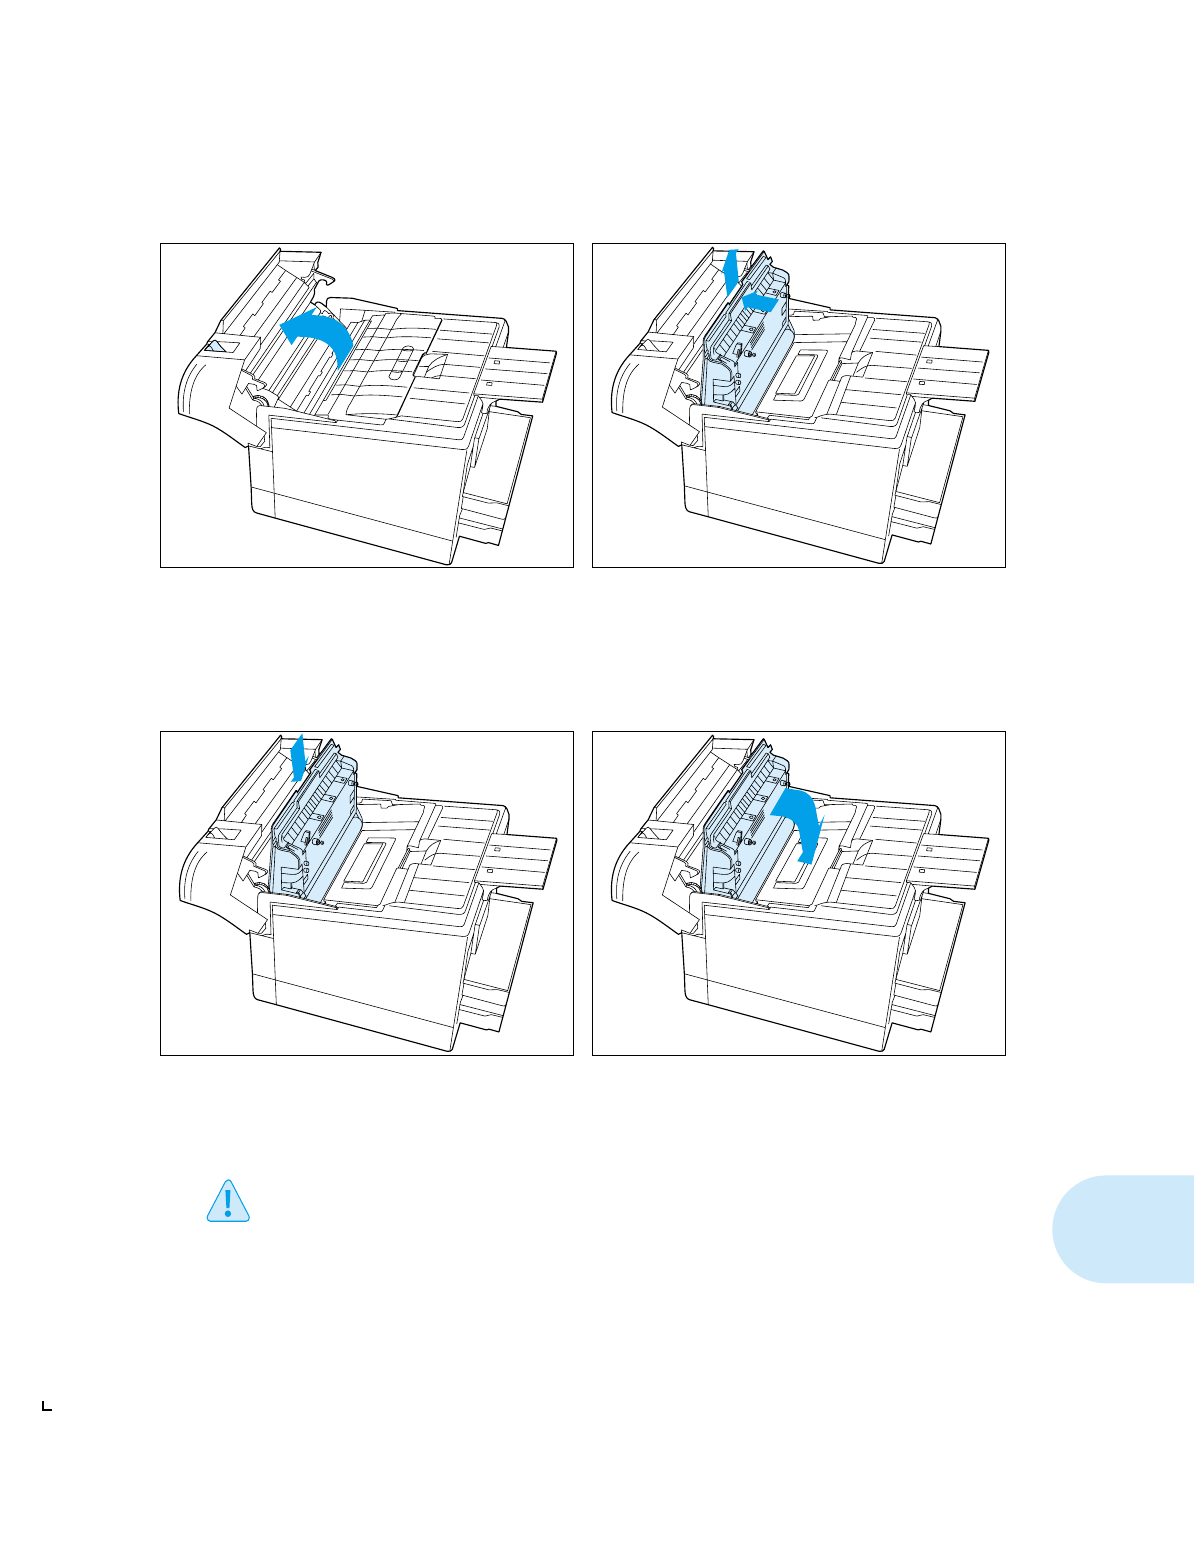
Replacing the Photoconductor / Drum
Chapter 7: Printer Maintenance and Consumables
❖
7-7
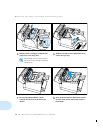
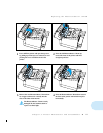
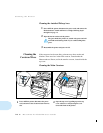
1
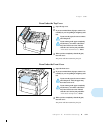
Power OFF the printer and open the top cover
by pulling up on the top cover release lever and
pivoting the cover toward the front of the
printer.
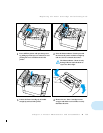
2
Pivot the old Photoconductor / Drum up
toward the front of the printer and lift it
straight up and out.
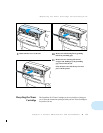
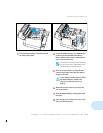
3
Remove the new Photoconductor / Drum from
its wrapper and insert it vertically into the
slots on the sides of the interior.
The Photoconductor / Drum is easily
damaged. Do not touch the drum or
expose it to direct light.
4
Pivot the Photoconductor / Drum down toward
the back of the printer until it falls into place
horizontally.