Polycom RealPresence Resource Manager System Operations Guide Manage Users
346 Polycom, Inc.
3 In the Associated Endpoints section, select and move the required
endpoints(s) to Selected Endpoints list. Move the unwanted endpoints(s)
to the Available Endpoints list. Press Shift-click or Ctrl-click to select
multiple items in the list.
4 In the Associated Roles section, select and move the required role(s) to
Selected Roles list. Move the unwanted role(s) to the Available Roles
list. Press Shift-click or Ctrl-click to select multiple items in the list.
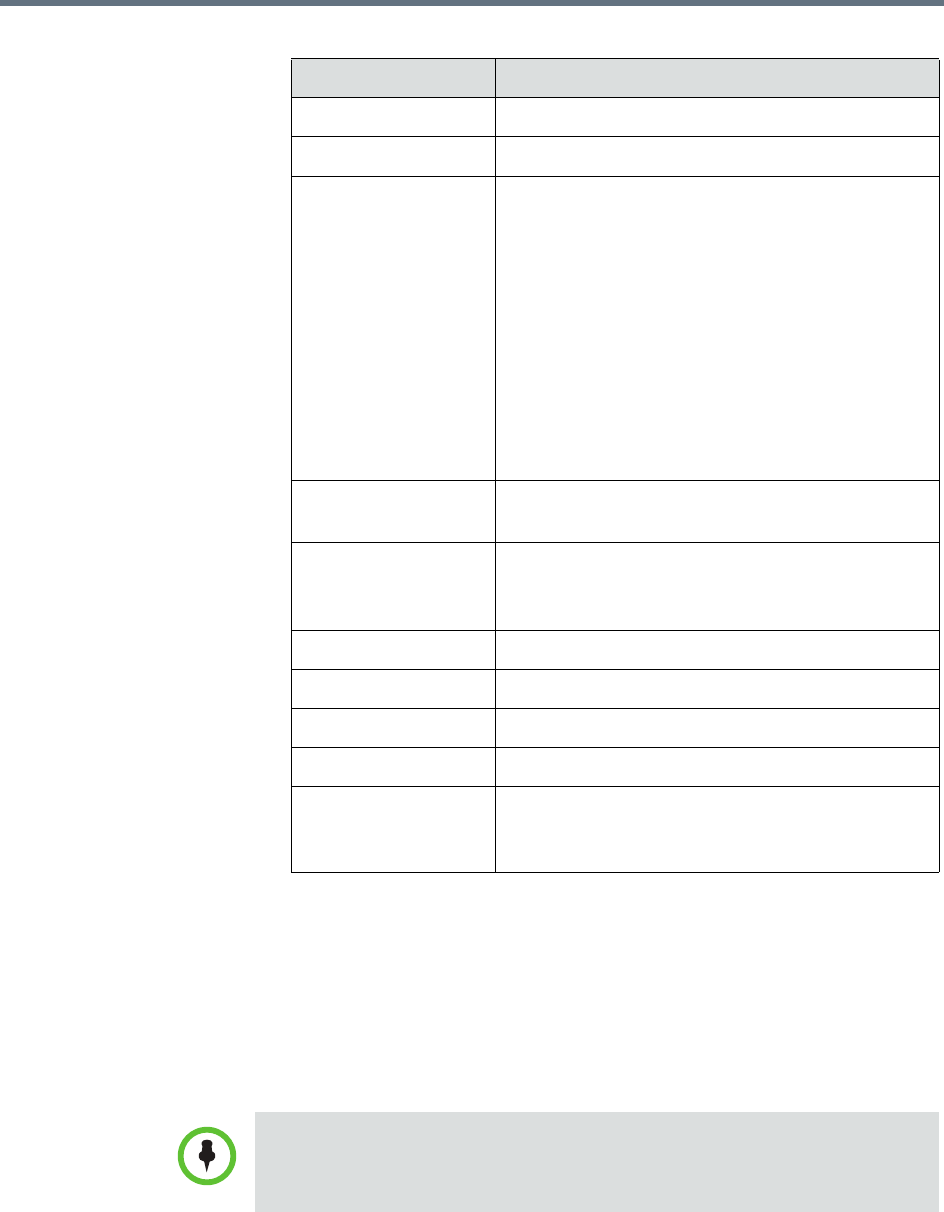
Column Description
First Name The user’s first name
Last Name The user’s last name
User ID The user’s unique login name. This user ID must
be unique across all rooms and users and across
all domains.
For Multi-Tenancy:
Create user names using the email address format.
This will ensure that all user names are unique.
Otherwise two people named Bob Smith
belonging to different tenants may end up with the
same user name. By following an email address
format, Bob Smith in TenantA could have
bsmith@tenantA.com as a user name and Bob
Smith in TenantB could have bsmith@tenantB.com.
Password The user’s assigned password. This password
must be a minimum of eight characters in length.
Email Address The user’s Email address. (The Email address is an
ASCII-only field.)
Title The user’s professional title.
Department The user’s department within the enterprise.
City The city in which the user’s office is located.
Phone Number The contact phone number for the user.
Assign Area If your RealPresence Resource Manager system
has areas enabled, you can choose to assign this
user to an area that you manage.
If the user has multiple endpoints, list the endpoints in order of priority, with the
primary endpoint first.


