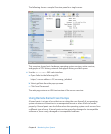
To enable and congure SNMP:
Use the /usr/bin/snmpconf command, which takes you through a basic text-based m
setup assistant for conguring the community name and saves the info in the
conguration le.
The snmp cong le is located in /usr/share/snmp/snmpd.conf.
SNMP Conguration Example
Step 1: Customize data
1 To customize the data provided by snmpd, add an snmpd.conf le using /usr/bin/
snmpconf as root or using sudo, by executing this command:
/usr/bin/snmpconf -i
If there are existing conguration les, you can read them into the assistant and
incorporate their contents with the output of the assistant.
2 Choose to read-n the le by indicating the le at /etc/snmp/snmpd.conf.
You then see a series of text menus.
3 Make these choices in this order:
a Select le: 1 (snmpd.conf).
b Select section: 5 (System Information Setup).
c Select section: 1 (The [typically physical] location of the system.).
d The location of the system: type text string here — such as “server_room.”
e Select section: f (nish).
f Select section: f (nish).
g Select File: q (quit).
You have created an snmpd.conf le with a creation date of today.
To verify its creation enter ls -l /usr/share/snmpd.conf.
Step 2: Restart snmpd to take changes
1 Open Server Admin.
2 Select a server, click the Settings button in the toolbar, and then click the General tab.
3 Deselect Network Management Server (SNMP).
4 Click Save.
You can also do this via the command line by killing and restarting the smnpd process
as root:
/usr/sbin/snmpd
182 Chapter 8 Monitoring Your System


