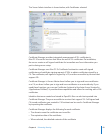
4 Click the Action button below the certicates list and choose “Generate Certicate
Signing Request (CSR).”
Certicate manager creates the signing request and shows the ASCII text version in
the sheet.
5 Click Save to save the CSR to the disk.
Your CA will have instructions on how to transfer the CSR to the signer. Some CAs
require you to use a web interface; others require sending the CSR in the body of a
mail message. Follow the instructions given by the CA.
The CA will return a newly signed certicate, which replaces the one you generated.
For instructions on what to do now with your newly signed certicate, see “Replacing
an Existing Certicate” on page 71.
Creating a Certicate Authority
To sign another user’s certicate, you must create a CA. Sometimes a CA certicate
is referred to as a root or anchor certicate. By signing a certicate with the root
certicate, you become the trusted third party in that certicate’s transactions,
vouching for the identity of the certicate holder.
If you are a large organization, you might decide to issue or sign certicates for people
in your organization to use the security benets of certicates. However, external
organizations might not trust or recognize your signing authority.
To create a CA:
1 Start Keychain Access.
Keychain Access is found in the /Applications/Utilities/ directory.
2 In the Keychain Access menu, select Certicate Assistant > Create a Certicate
Authority.
The Certicate Assistant starts. It will guide you through the process of making the CA.
3 Choose to create a Self Signed Root CA.
4 Provide the Certicate Assistant with the requested information and click Continue.
You need the following information to create a CA:
An email address Â
The name of the issuing authority (you or your organization) Â
You also decide if you want to override the defaults and whether to make this CA the
organization’s default CA. If you do not have a default CA for the organization, allow
the Certicate Assistant to make this CA the default.
In most circumstances, do not override the defaults. If you do not override the defaults,
skip to step 16.
66 Chapter 4 Enhancing Security


