


5-2
Getting Started
5976135 BARCOREALITY SIM6 21032000
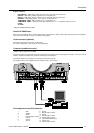
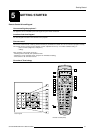
1 Function keys : user programmable keys with functions for direct access.
2 ADJ. : ADJUST key, to enter or exit the adjustment mode.
3Address key (recessed key), to enter the address of the projector (between 0 and 9). Press the recessed address key with
a pencil, followed by pressing one digit button between 0 and 9.
4 Selection key (*) : to direct access the zoom/focus/shift functions.
5 PAUSE : to stop projection for a short time, press 'PAUSE'. The image disappears but full power is retained for immediate restarting.
6 STBY : stand-by button, to start projector when the power switch is switched on and to switch off the projector without switching
off the power switch.
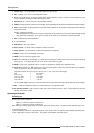
Attention : Switching to Stand-by.
When the projector is running and you want to go to stand-by, press the stand-by key for 2 seconds until the message 'Saving
data, please wait' is displayed. Do not press any longer on the stand-by key otherwise the projector will restart.
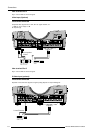
7 Mute : to interrupt the sound reproduction.
8? : not implemented.
9 Digit buttons : direct input selection.
10 Audio controls : use these buttons to obtain the desired sound level.
11 Picture controls : use these buttons to obtain the desired picture analog level.
12 PHASE : used to remove the instability of the image.
13 FREEZ : press to freeze the projected image.
14 TEXT : when adjusting one of the image, e.g. controls during a meeting, the displayed bar scale can be removed by pressing
'TEXT' key first. To re-display the bar scale on the screen, press 'TEXT' key again.
15 ENTER : to start up the adjustment mode or to confirm an adjustment or selection in the adjustment mode.
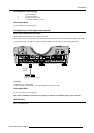
16 Cursor Keys (on RCU) or '+' and '-' keys (cursor keys) on the local keypad : to make menu selections when in the adjustment
mode or to zoom/focus when the direct access is active.
Comparision between the cursor keys and the use of the '+' and '-' keys on the local keypad :
RCU = local keypad
cursor key up = '+' key up
cursor key down = '-' key down
cursor key right = '+' key right
cursor key left = '-' key left
Use the '+' and '-' keys (cursor keys) : to increase or decrease the analog level of the image controls when they are first selected.
17 EXIT : to leave the adjustment mode or to scroll upwards when in the adjustment mode.
18 RC operating indication : lights up when a button on the remote control is pressed. (This is a visual indicator to check the
operation of the remote control)
Operating the Projector
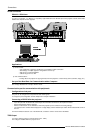
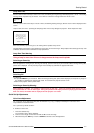
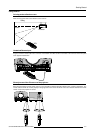
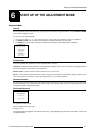
Switching on
Use the power switch to switch on.
When '0' is visible, the projector is switched off.
When '1' is visible, the projector is switched on.
When switching on with the power switch, the projector starts in the stand by mode. The projector mode indication lamp is red.
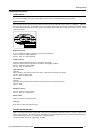
To start image projection :
a. press the 'Stand by' button once on the local keypad or on the remote control. The projector mode indication lamp will be green.
b. press a digit button to select an input source. The projector mode indication lamp will be green.