


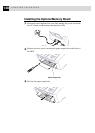
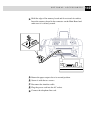

143
SETTING UP THE MFC AND COMPUTER TO WORK TOGETHER
Win95/98/NT4.0
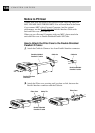
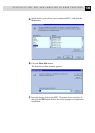
A Click the START button and then select RUN from the Start Menu.
B Type “X:\SETUP.EXE” [where X is your CD-ROM Drive] in the
command line box.
C Click on OK.
YOU CAN EXIT FROM THE AUTO-INSTALLER AT ANYTIME BY
CLICKING ON THE ICON IS THE BOTTOM RIGHT HAND
CORNER OF YOUR SCREEN.
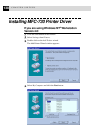
4
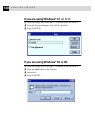
From the Auto-Installer select your preferred language by double
clicking on it with your mouse.
5
The MFC-740 is a parallel colour inkjet device so select this option,
again by double clicking.
6
Select STEP 1 and install the Brother Resource Manager. You can
either install the software now or make floppies* [to install the
software on another PC without a CD-ROM Drive]. Follow the
onscreen prompts and re-boot your PC when instructed to do so.
If you wish to install MFL Pro, repeat Steps 3 to 5, then select STEP 2 to
install MFL Pro. Again following the onscreen prompts and re-booting
your PC when instructed to do so.
7
When installation is complete remove the CD-ROM from the drive.
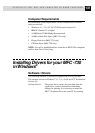
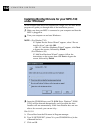
Installing the Maintenance Utility on
MS-DOS
®
(For MFC 740 only)
The Scanner driver and fax application work only in the Windows
environment, they cannot be used in DOS. You can use the MFC as a
printer by using an ESC/P printer driver.
To print from your application with the MFC-740, select an Epson ESC/
P compatible printer such as Epson LQ-510, LQ-810 or LQ-2550 in your
application’s printer selection menu. Epson LQ-510 and 810 supports
only monochrome printing. The settings for printing can be done in the
MAINTENANCE UTILITY for DOS.