26
5
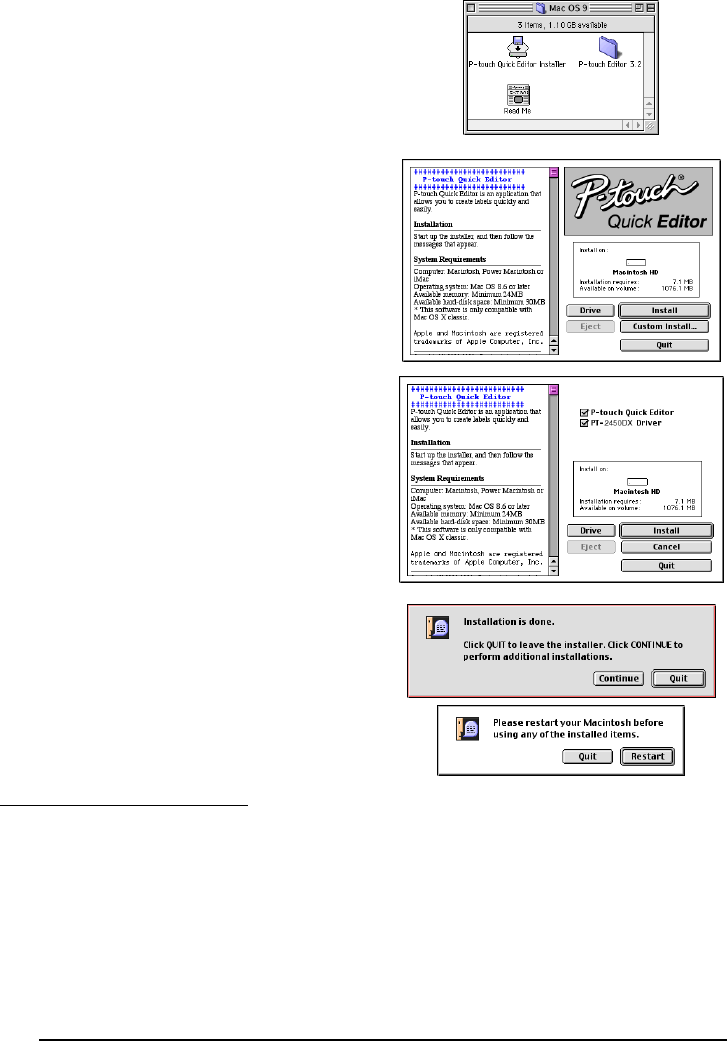
Double-click the P-touch Quick Editor
Installer icon in the folder that appears. The
installer starts up.
6
Select the installation method.
•For a basic installation
Clicking “Install” immediately starts install-
ing the most basic options.
☞
About 20 MB of available hard-disk
space is needed to begin installation. If
enough hard-disk space is available,
click “Install”.
•For a custom installation
Clicking “Custom Install” displays a dialog
box that allows you to select which options
to install.
Only the options with a check mark beside
them will be installed. Select the options
that you wish to install, and then click
“Install”.
☞
In order to print from the P-touch
2450DX, “PT-2450DX Driver” must be
selected for installation.
7
When the dialog box appears, indicating that
the installation is finished, click “Quit”.
8
When the dialog box appears, asking if you
wish to restart the computer, click “Restart”
to restart the computer.
1
With the P-touch and the Macintosh turned off, connect the P-touch to the computer
using the enclosed USB interface cable as described on page 6.
Be sure to leave the
P-touch turned off.
2
Turn on the Macintosh.
3
Insert the enclosed CD-ROM into the computer’s CD-ROM drive.
With Mac OS X 10.1 to 10.2.4:


